TL;DR
- A helpdesk is three things: a table of tickets, a form people can submit from, and a way to reply by email. Everything else is optional.
- Buying a helpdesk product means learning its data model and bending your process to it. At a handful of tickets a day that is a lot of ceremony.
- Five fields is genuinely enough to start: subject, name, email, status, and the message.
- Two-way email on the ticket is the part that makes it feel like a real helpdesk rather than a list.
- Build it in an afternoon, then add only what people actually ask for.
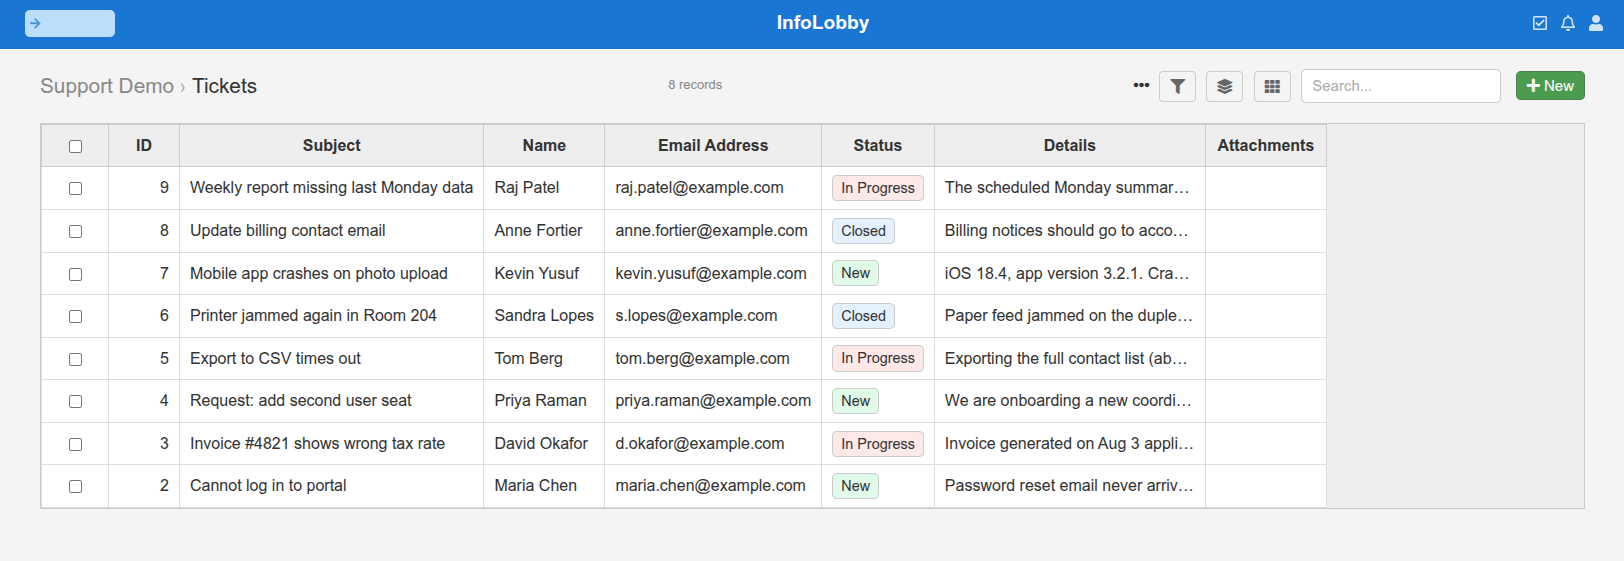
Most helpdesk tools ask you to buy a product, learn its data model, and then bend your process to fit it. If your support volume is a handful of tickets a day, that is a lot of ceremony for what is really a list of problems, a way for people to report them, and a place to reply.
You can build that in InfoLobby in about five minutes. Here is the whole thing, start to finish.
Quick Answer
Create a Tickets table, turn on Allow Email for it, publish a web form with the fields customers should fill in, and embed that form on your site. Submissions land as tickets. Open a ticket and reply by email straight from the record. Replies come back into the ticket's timeline, so the whole conversation stays with the ticket.
Optionally, give the table its own inbound address and forward support@yourdomain.com to it, so emailed problems become tickets too.
What You Need First
One thing: an SMTP integration connected in your workspace, with at least one from-domain set (for example acme.com). That is what lets a ticket send mail as you rather than as a no-reply robot.
If you have not set one up, do that first in Integrations. It takes a couple of minutes and it is the only prerequisite. Everything else below is built from scratch.
Step 1: Create The Tickets Table
In your workspace, create a new table from scratch and call it Tickets.
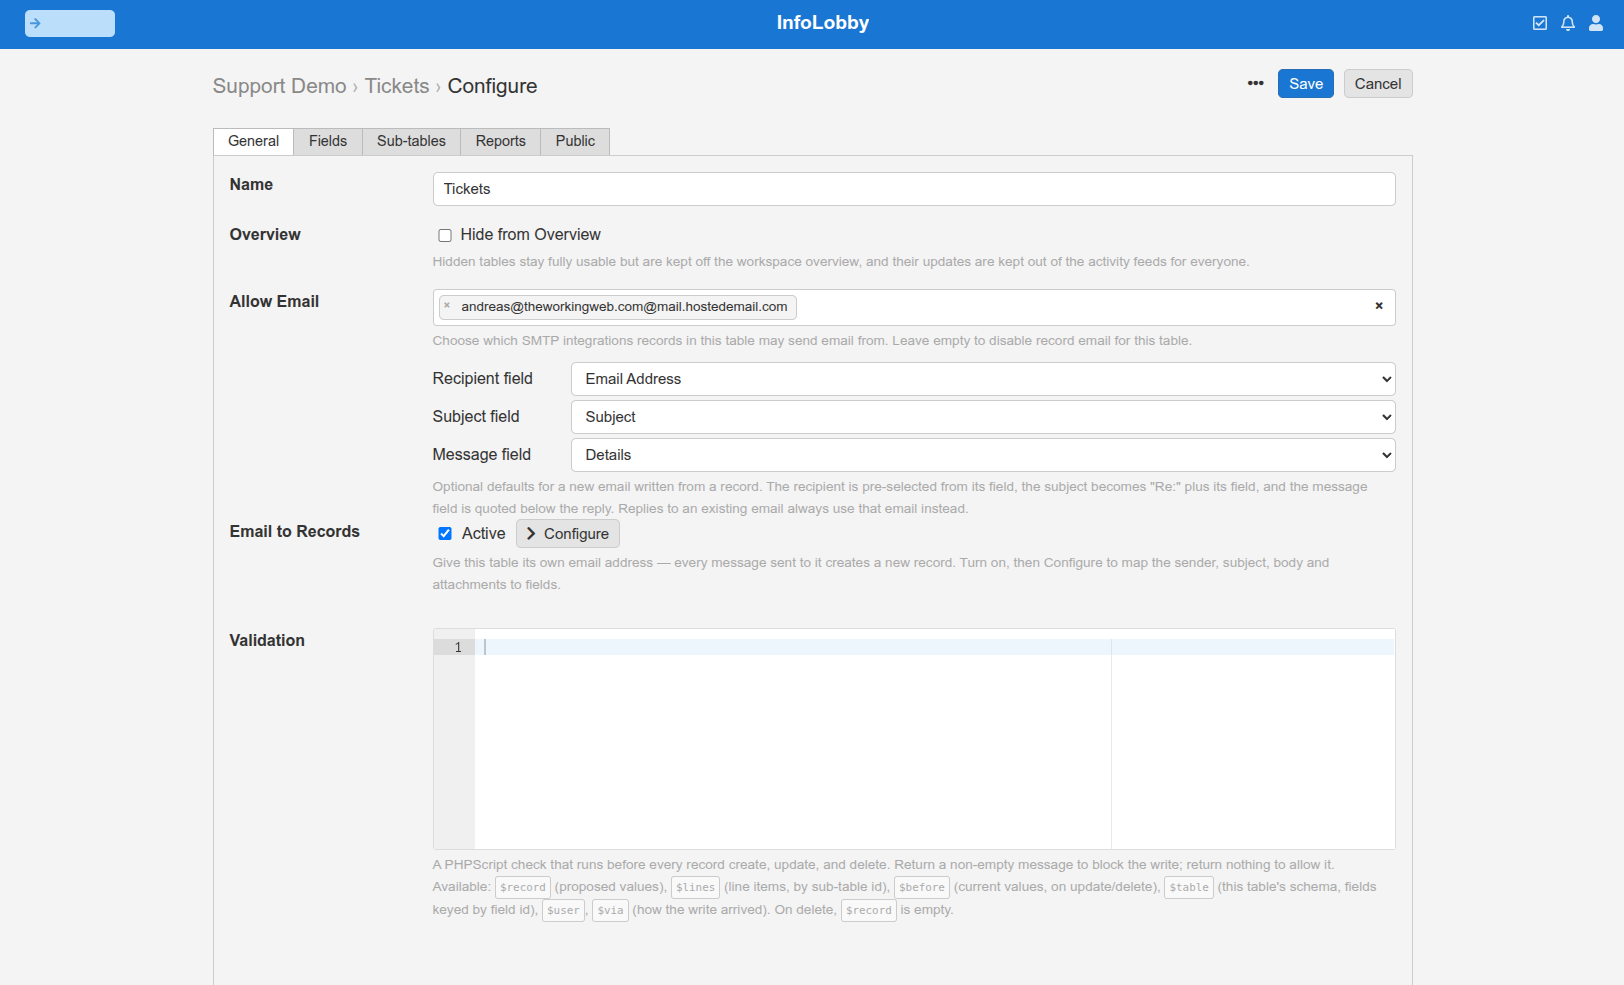
While you are on the General tab, tick Allow Email and pick your SMTP integration. This is the step people skip, and it matters: email is off by default for every table, so without it there is no compose button on a ticket and no way to reply to the customer from inside InfoLobby.
Step 2: Add The Fields
Keep it small. You can add more later, and adding a field to a live table takes seconds.
| Field | Type | Why |
|---|---|---|
| Subject | Text | Short description of the problem, used as the ticket name |
| Name | Text | Who reported it |
| Email Address | Text | Where replies go |
| Status | Select: New, In Progress, Closed | The whole workflow, for now |
| Details | Paragraph | The actual problem |
| Attachments | File | Screenshots and log files |
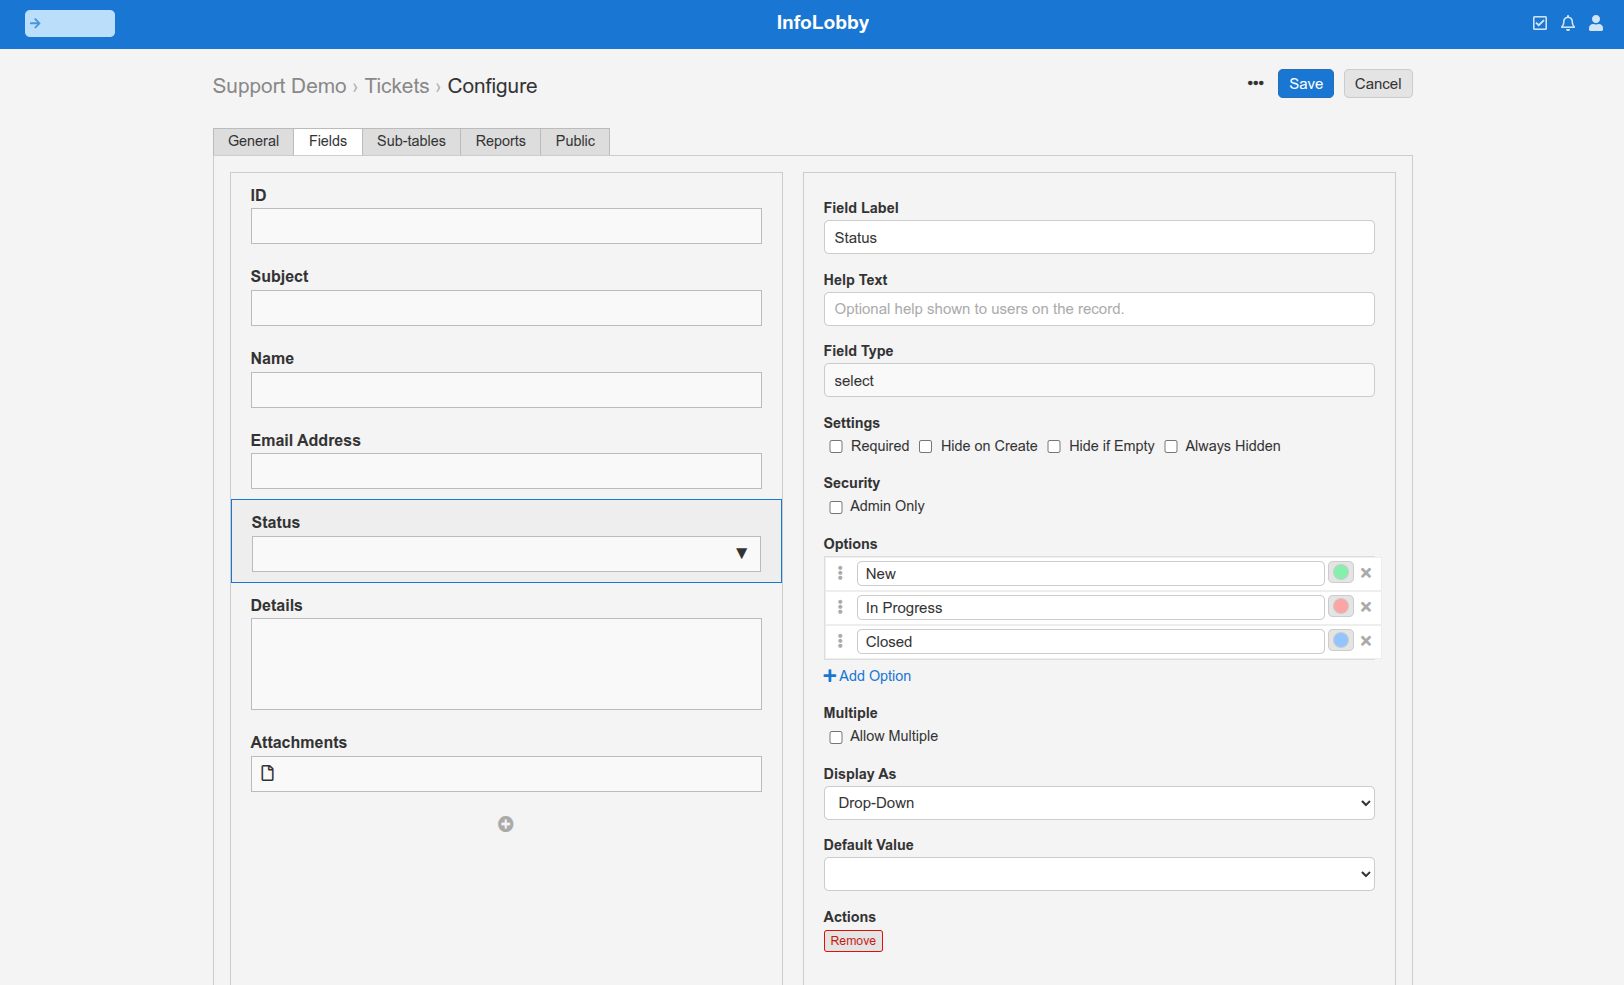
One more field you will probably want soon, but do not need to launch: Assigned To, a User field, once more than one person is answering tickets. Add it when you need it.
Save the table.
Step 3: Publish The Web Form
Go back into the table's configuration, open the Public tab, and create a new web form.
- Allowed domains: the site you will embed the form on. You can leave this open while testing, but lock it down before you go live so nobody else can host your form.
- Fields: Subject, Name, Email Address, Details, and Attachments. Leave Status off. Every ticket starts as New, and customers should not be picking it.
- CAPTCHA: tick it. A public support form is exactly the kind of thing bots find.
- HTML header: a heading and a line of instructions, so the form explains itself.
- Submit message: something like "Thank you. Someone will be in contact with you shortly."
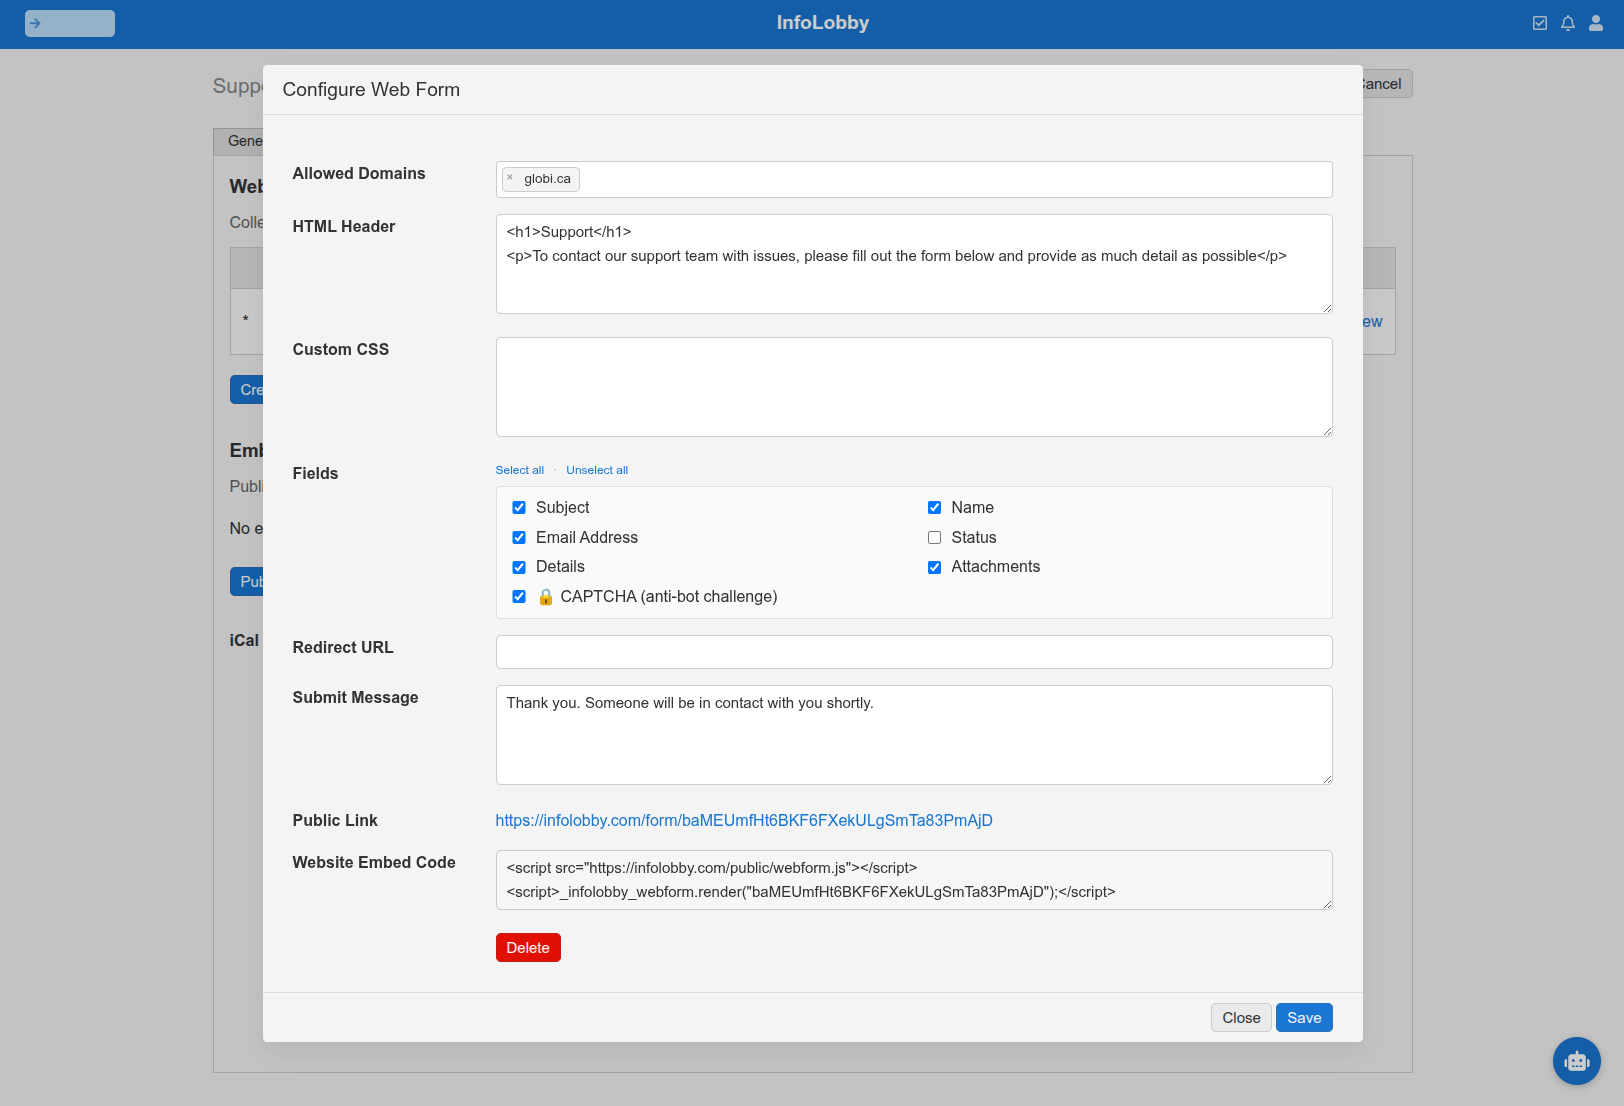
Save, and InfoLobby hands you a direct link plus the embed HTML. Drop the embed on your contact or support page and you are collecting tickets.
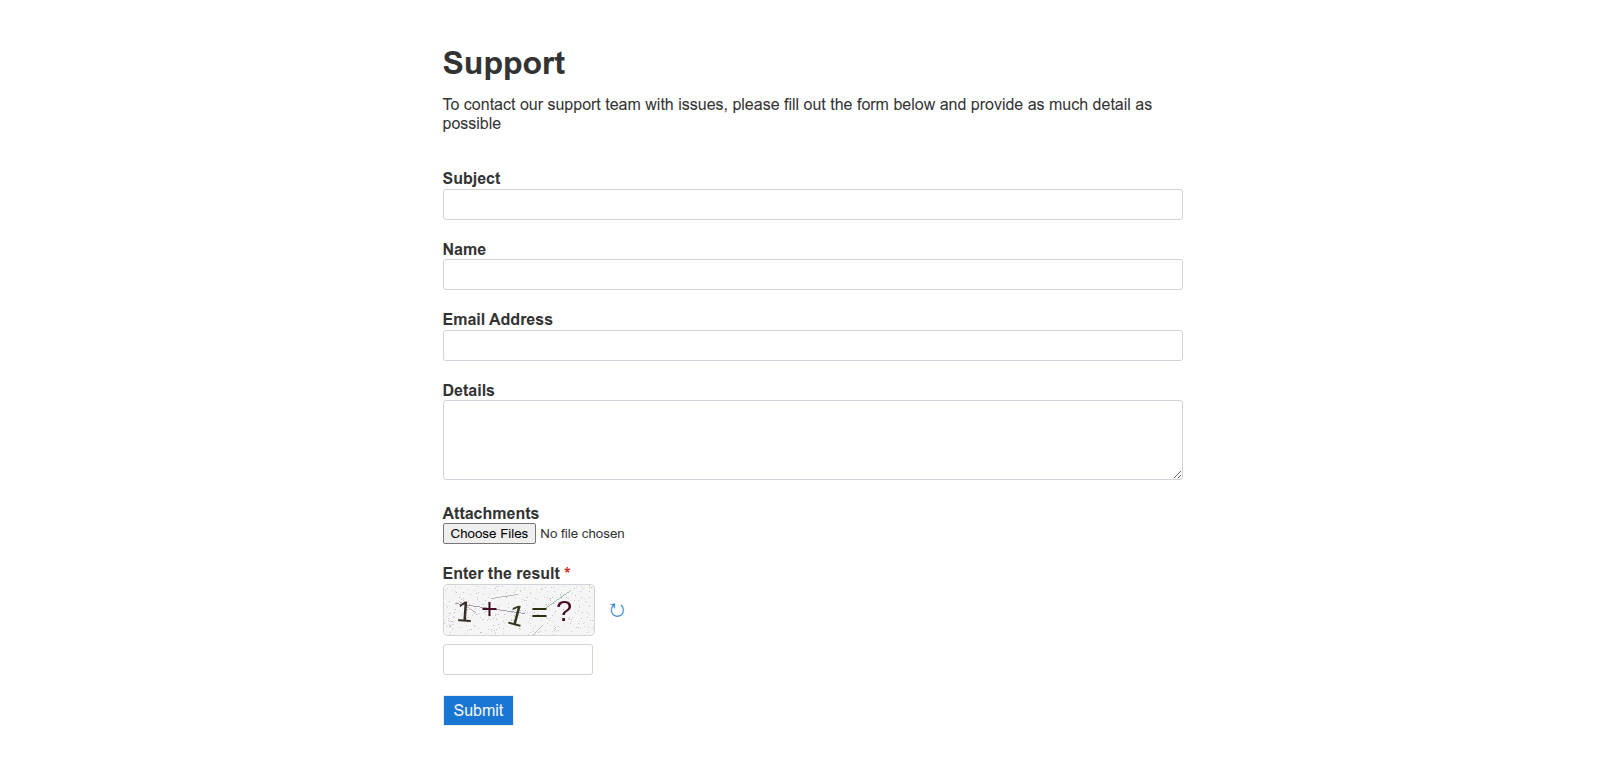
You can style the form with custom CSS or redirect to your own thank-you page instead of showing a message. Neither is required to go live.
Step 4: Reply From The Ticket
Submit the form once and the ticket appears in the table. Open it, and next to the comments panel there is an envelope icon.
Click it and the compose window opens with the customer's address already in the To box and the subject already set to "Re:" plus the ticket subject. That prefill is not magic: in the table's Email settings you point three pickers at your own fields (recipient, subject, message), which for this helpdesk are Email Address, Subject, and Details. Set it once and every first reply is a one-click job.
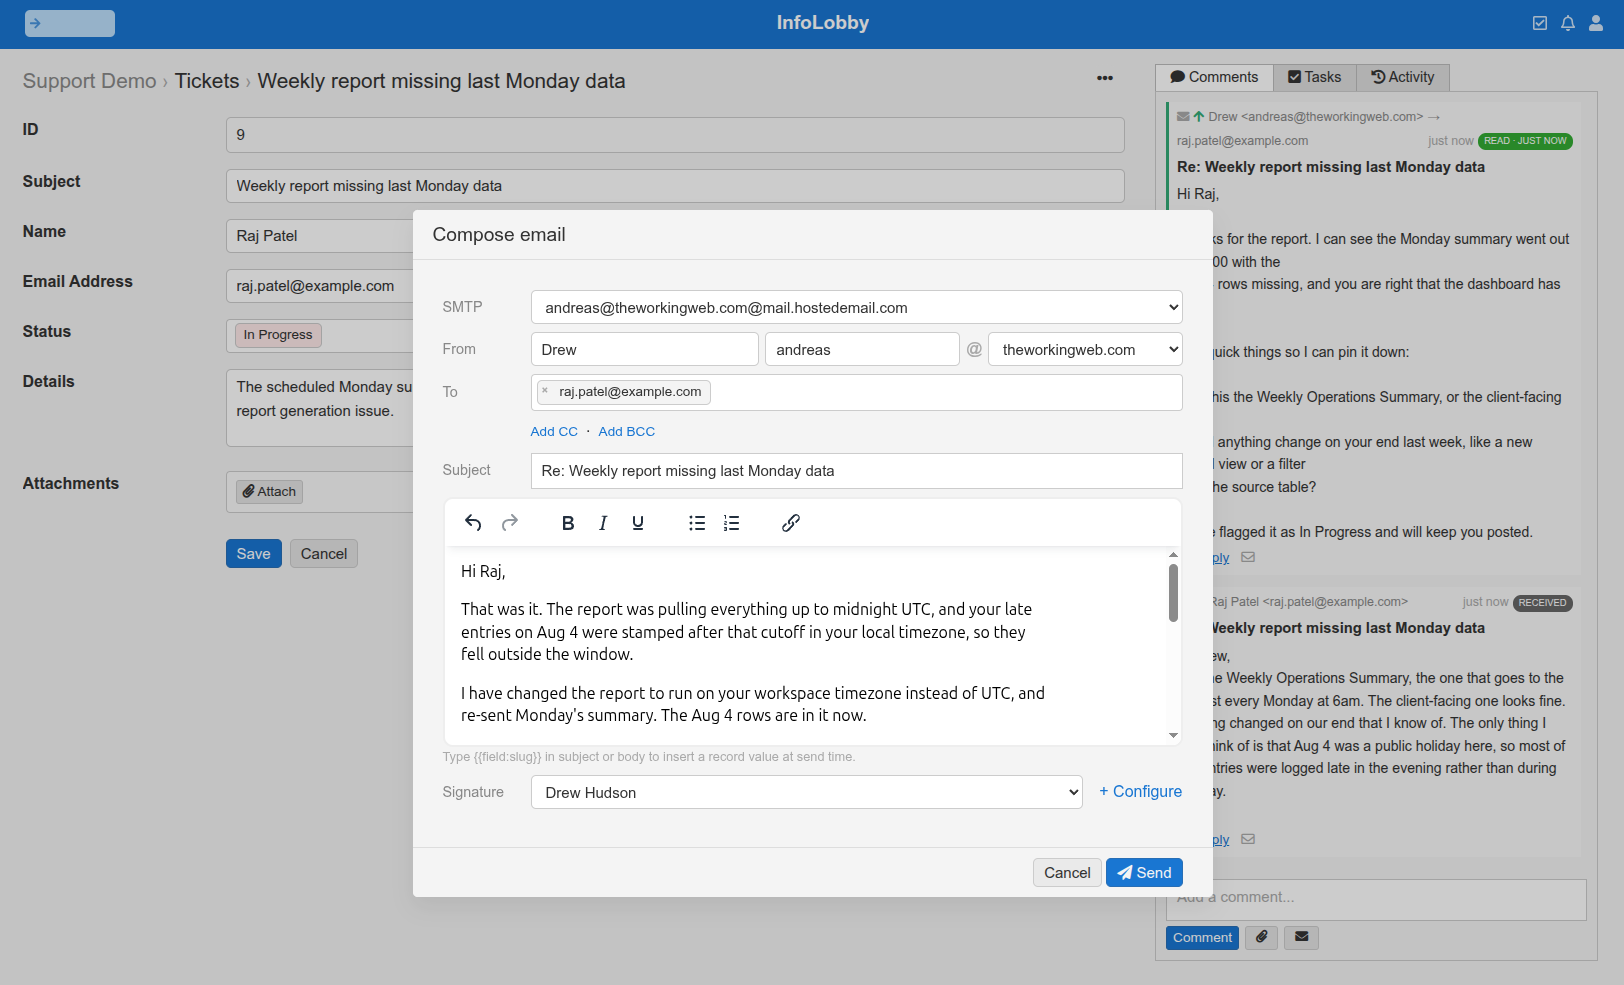
Send it. The email appears in the ticket's timeline right away with a queued pill, which flips to sent, and then to read when the customer opens it.
When they reply, their message lands back in the same timeline as part of the ticket. Your team keeps replying from the record; the customer just replies in their normal email client and never knows the difference. Bounces are caught too, so a dead address shows as bounced instead of silently vanishing.
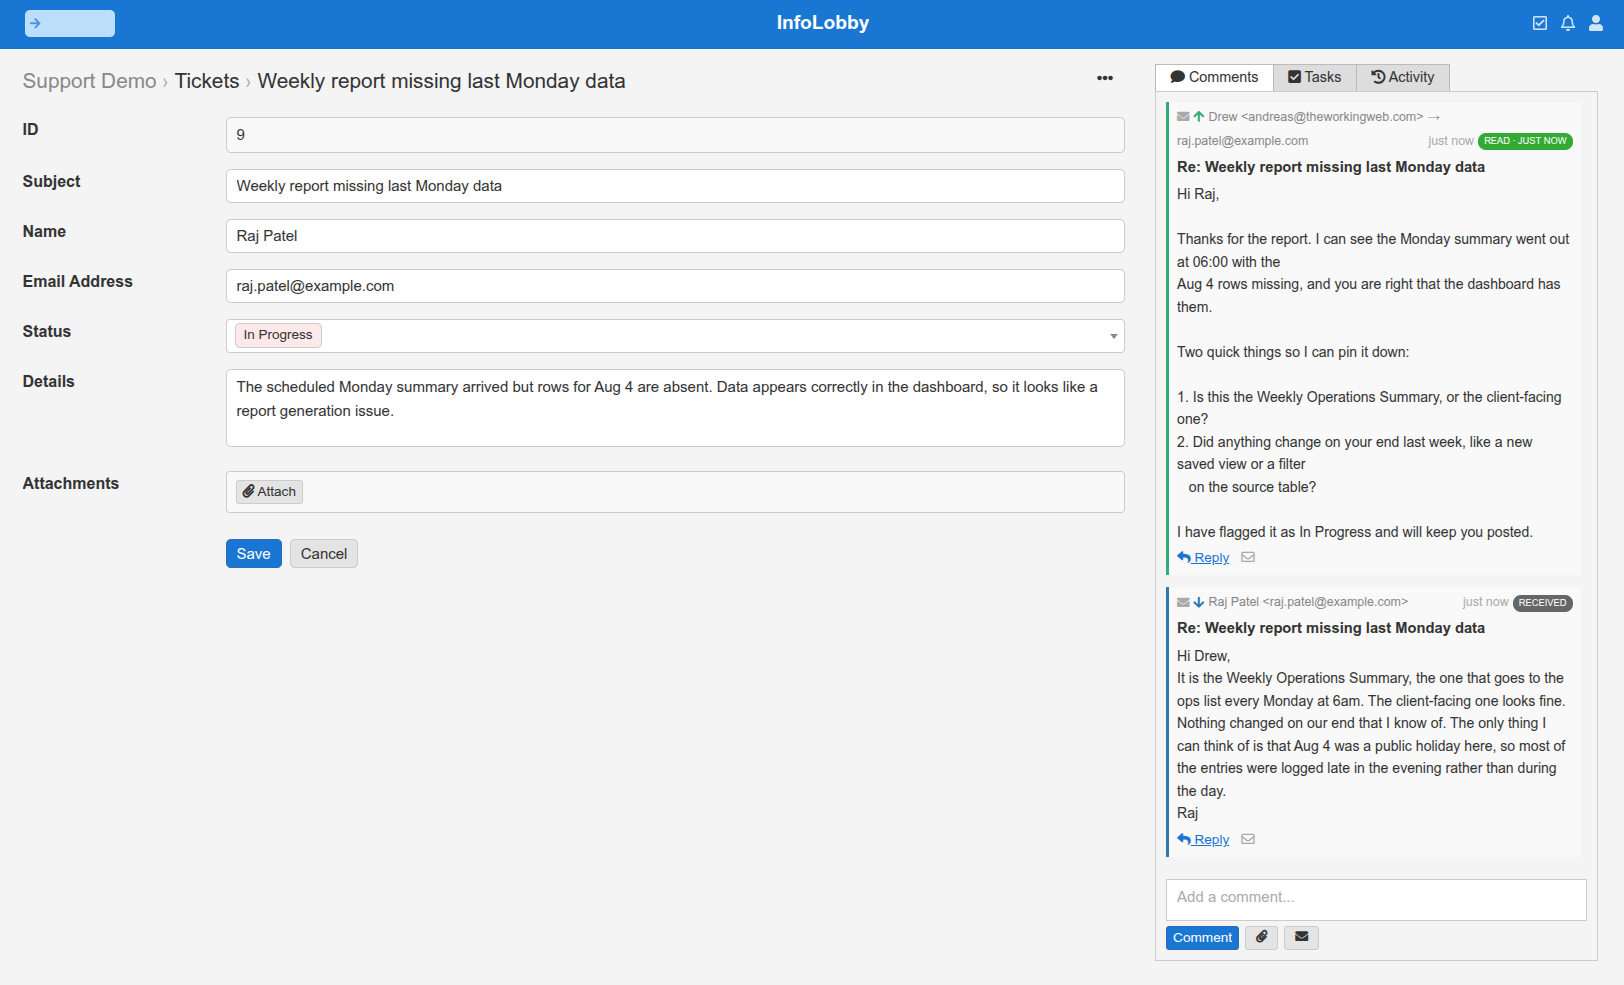
That is the helpdesk. Form in, email out, conversation attached to the ticket.
Step 5 (Optional): Turn Your Support Address Into Tickets
Not everyone will use the form. Some will email support@yourdomain.com because that is what they have always done.
Back on the table's General tab, open Email to Records. Tick Active and map the parts of an email onto your fields:
- Subject to Subject
- From (email) to Email Address
- From (name) to Name
- Body to Details
- Attachments to your Attachments file field
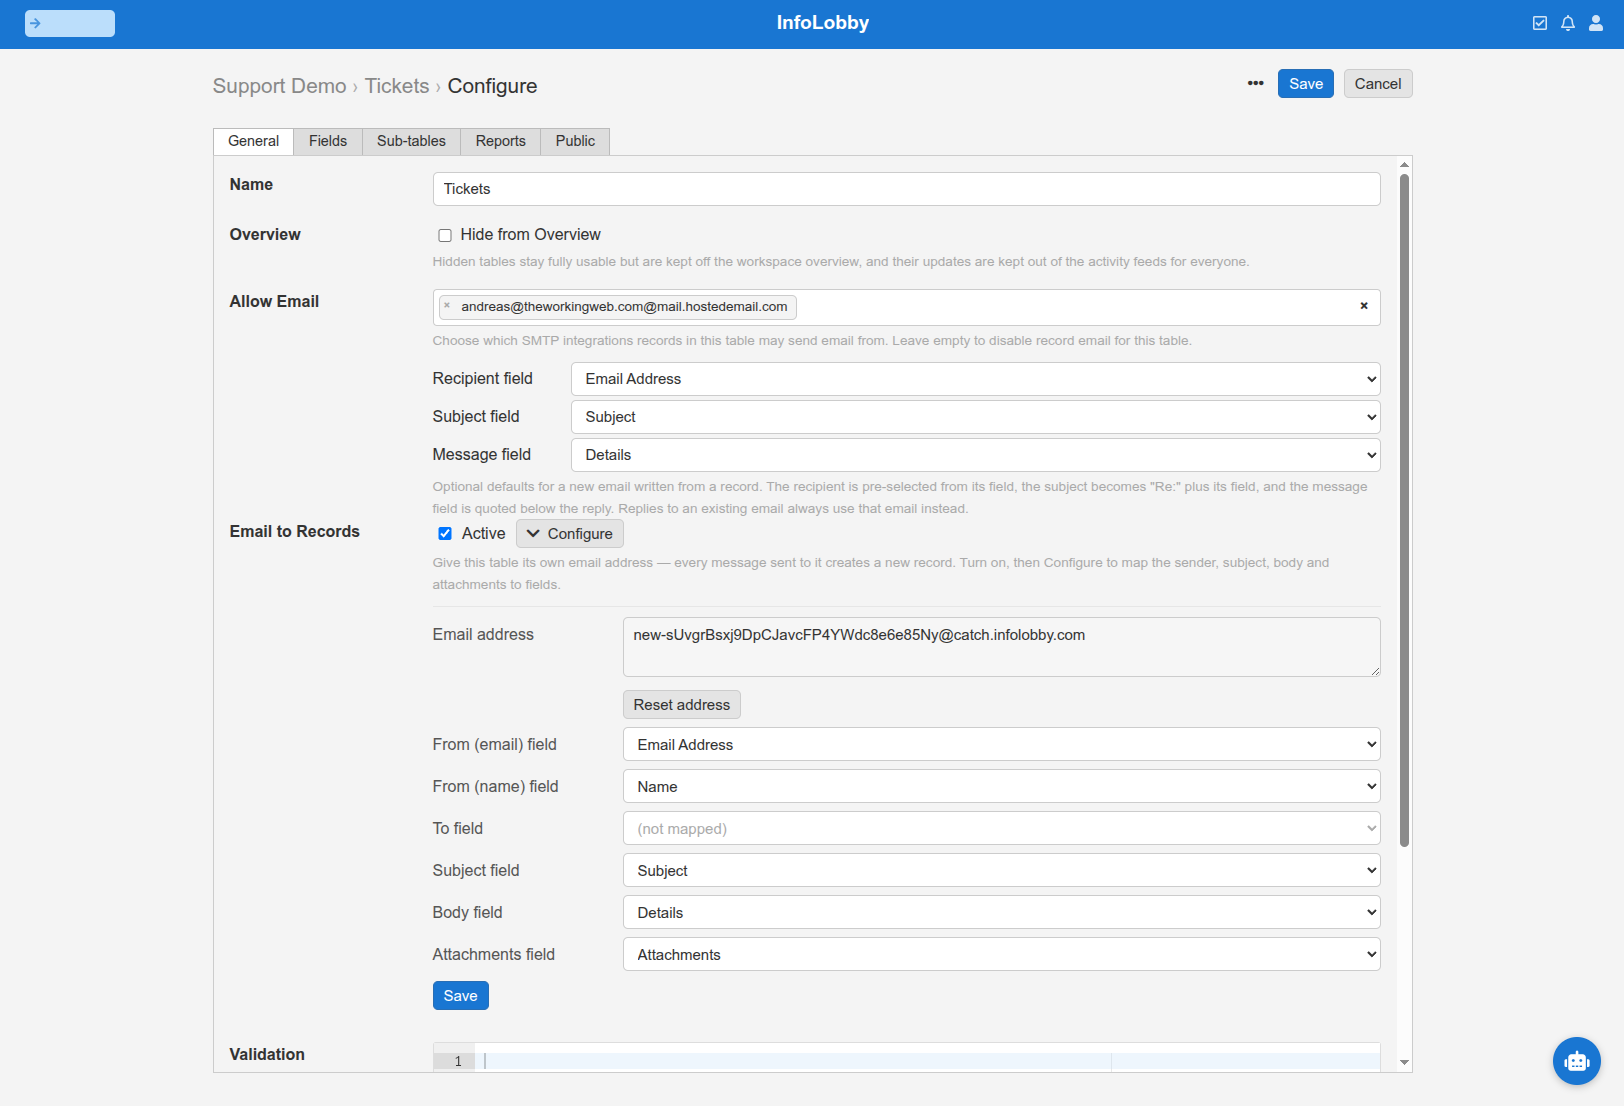
Save, and InfoLobby gives you a unique inbound address. Forward support@yourdomain.com to it. Every message that arrives creates a ticket, with attachments included, and shows up in the same table as the form submissions.
Treat that address like a shared secret. There is no sender verification, so if it leaks and starts collecting spam, reset it and issue a fresh one.
What To Add Next
The five-minute version is deliberately thin. Once tickets are actually flowing, these are the natural next steps, in the order most teams want them:
- Views: one for open tickets, one for the ones assigned to you, one for anything untouched in three days. Views are just saved filters, so this costs nothing.
- Assignment: add a User field and an automation that emails the assignee when a ticket lands on them.
- Acknowledgement: an automation on record creation that sends "we got it, here is your ticket number" so nobody has to wonder.
- Escalation: a scheduled automation that flags anything sitting in New past your response target.
- Reporting: tickets per week, time to close, volume by status. It is a database table, so this is a report, not an integration.
None of it is required on day one, and none of it means migrating to a bigger tool later.
When This Is Not The Right Answer
Being straight about it: this is a small-team helpdesk, not Zendesk.
If you need customer-facing ticket portals, published SLA timers, a knowledge base with deflection, CSAT surveys, or twenty agents working a shared queue with round-robin routing, buy a helpdesk product. Those are real features and rebuilding them is not a five-minute job.
What this does cover is the very common case underneath all that: a few people, a form on the website, an inbox that keeps losing things, and a need to see every conversation in one list. If that is you, a purpose-built ticket table you fully control beats a subscription you outgrow in the other direction.
Why Build It Instead Of Buying It
The reason is not price, though there is a difference there.
It is that your helpdesk is a table in the same workspace as everything else. The ticket can link to the customer record, which links to their orders, which links to the invoice. A support conversation stops being a walled garden that you have to sync out of. When your process changes, you add a field instead of filing a feature request.
You started with five fields and a form. In five minutes.
Try it in InfoLobby or read the web forms guide and the email setup guide for the detail behind each step.
Related reading: package a working system with App Packs, modular business software building blocks, and small business automation hub. See also database web forms and internal tools software.