Automations
Automations run when records change, on a schedule, on demand, or when a webhook URL is called.
Trigger types
| Trigger | Runs when |
|---|---|
| On Create | A record is created in InfoLobby or through a web form |
| On Update | A record is updated in InfoLobby |
| On Delete | A record is deleted in InfoLobby |
| On Schedule | A configured time arrives — every day, only on chosen weekdays, or only on chosen days of the month. See On Schedule triggers. |
| On Date Field | A record's date field reaches a chosen day — runs once for each matching record. Pick the date field, how many days before/after (or on) the date to fire, and the hour. For example, "3 days before" a Due Date runs the automation for every record whose due date is three days away. |
| On Demand | You run it manually |
| On Webhook | A GET or POST request hits the trigger URL (runs in the background) |
| On Web Page | Someone visits the flow's public page URL — the flow runs immediately and returns an HTML page |
| On Comment Added | Someone adds a comment to a record. Comments posted by automations themselves are ignored, so a flow that comments can't trigger itself. Use the {{comment.body}}, {{comment.author}}, and related tokens. |
| On Email Reply | A reply to an email sent from a record arrives back on that record. Use the {{email.subject}}, {{email.from}}, {{email.body}}, and related tokens. |
| On Email Opened | A recipient opens an email sent from a record (the first time only). Requires email tracking; some email apps block the tracking image, so opens aren't guaranteed. Use the {{email.to}}, {{email.subject}}, {{email.read_at}}, and related tokens. |
| On Task Completed | A task linked to a record on this table is marked done. Runs once, on the moment it's completed. Use the {{task.title}}, {{task.status}}, {{task.completed_by_email}}, {{task.due_date}}, and related tokens, plus the record's own {{record.*}} tokens. Standalone (personal) tasks that aren't attached to a record don't trigger automations. |
Finding automations
Each table's automations page lists that table's automations. The search box filters the list as you type.
Tick All flows to search across every workspace you administer — results show each automation's workspace and table, so you can jump straight to it without remembering where it lives.
Turning an automation on or off
The Active column is a switch. Click it to enable or disable an automation right from the list, without opening it. This works on the cross-table All flows results too, so you can pause an automation in another workspace from the same screen. A disabled automation stays exactly as you built it, it just stops running.
You can also set Active in the automation's settings panel while editing it.
Build options
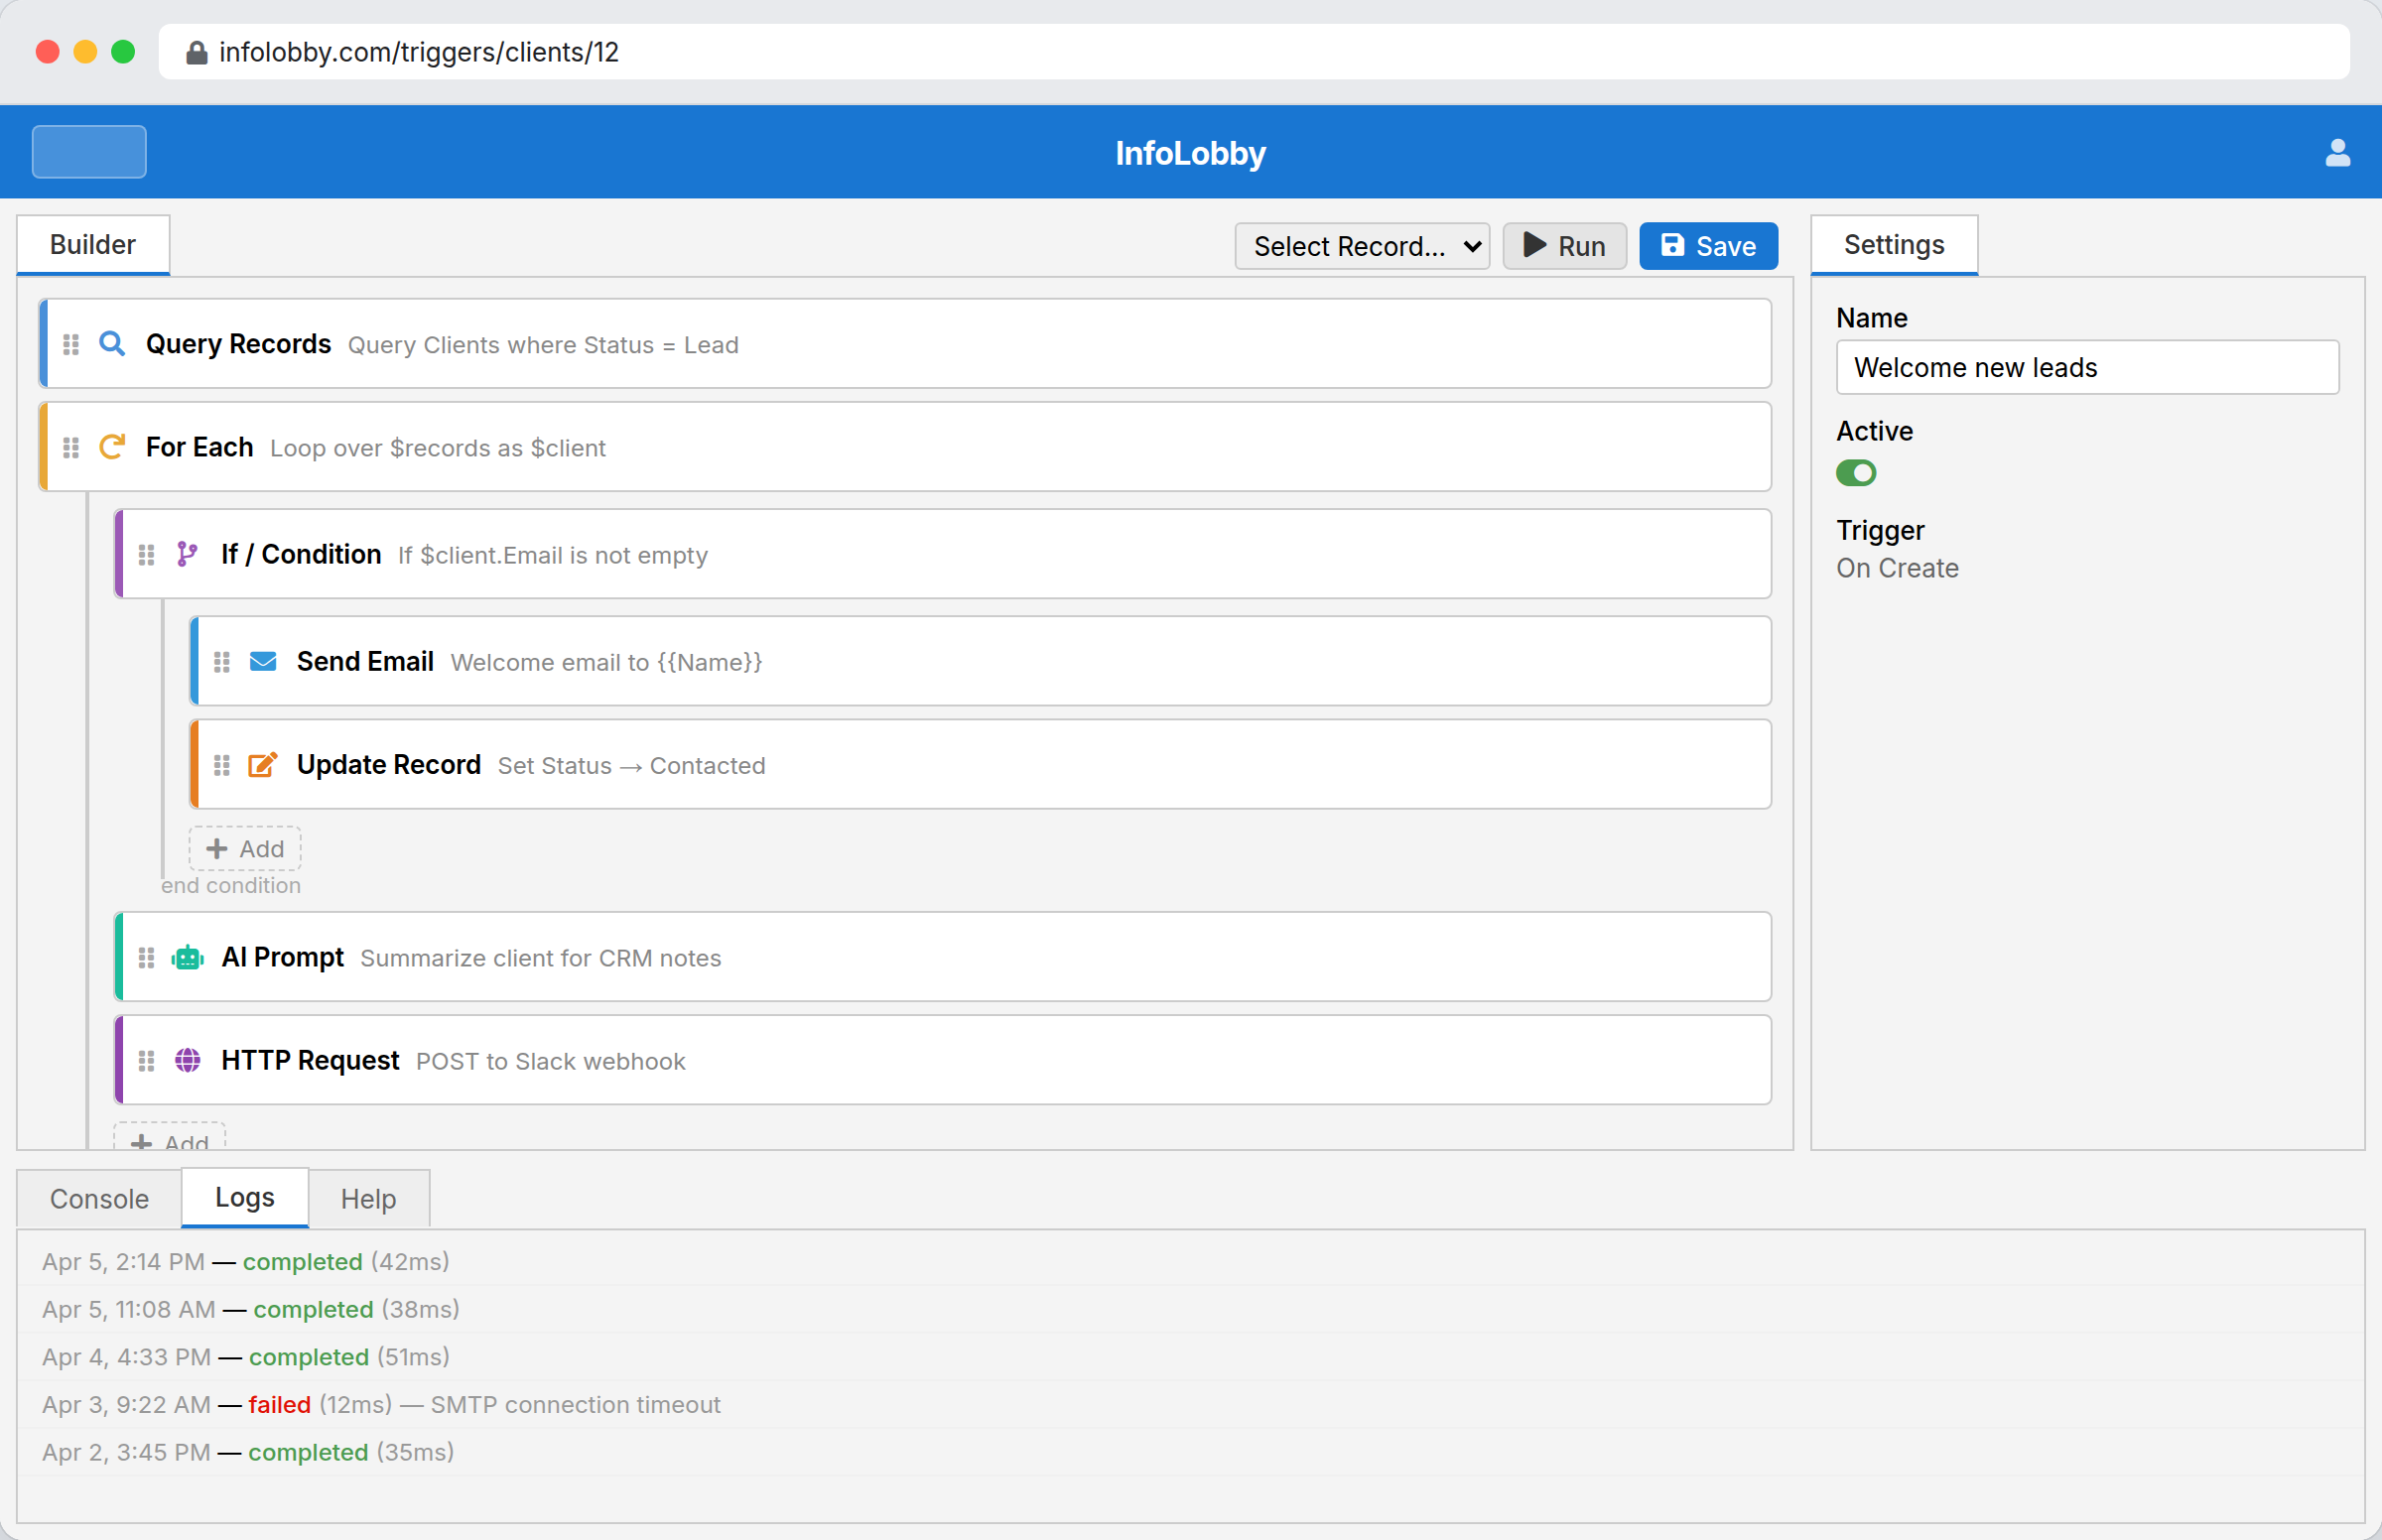
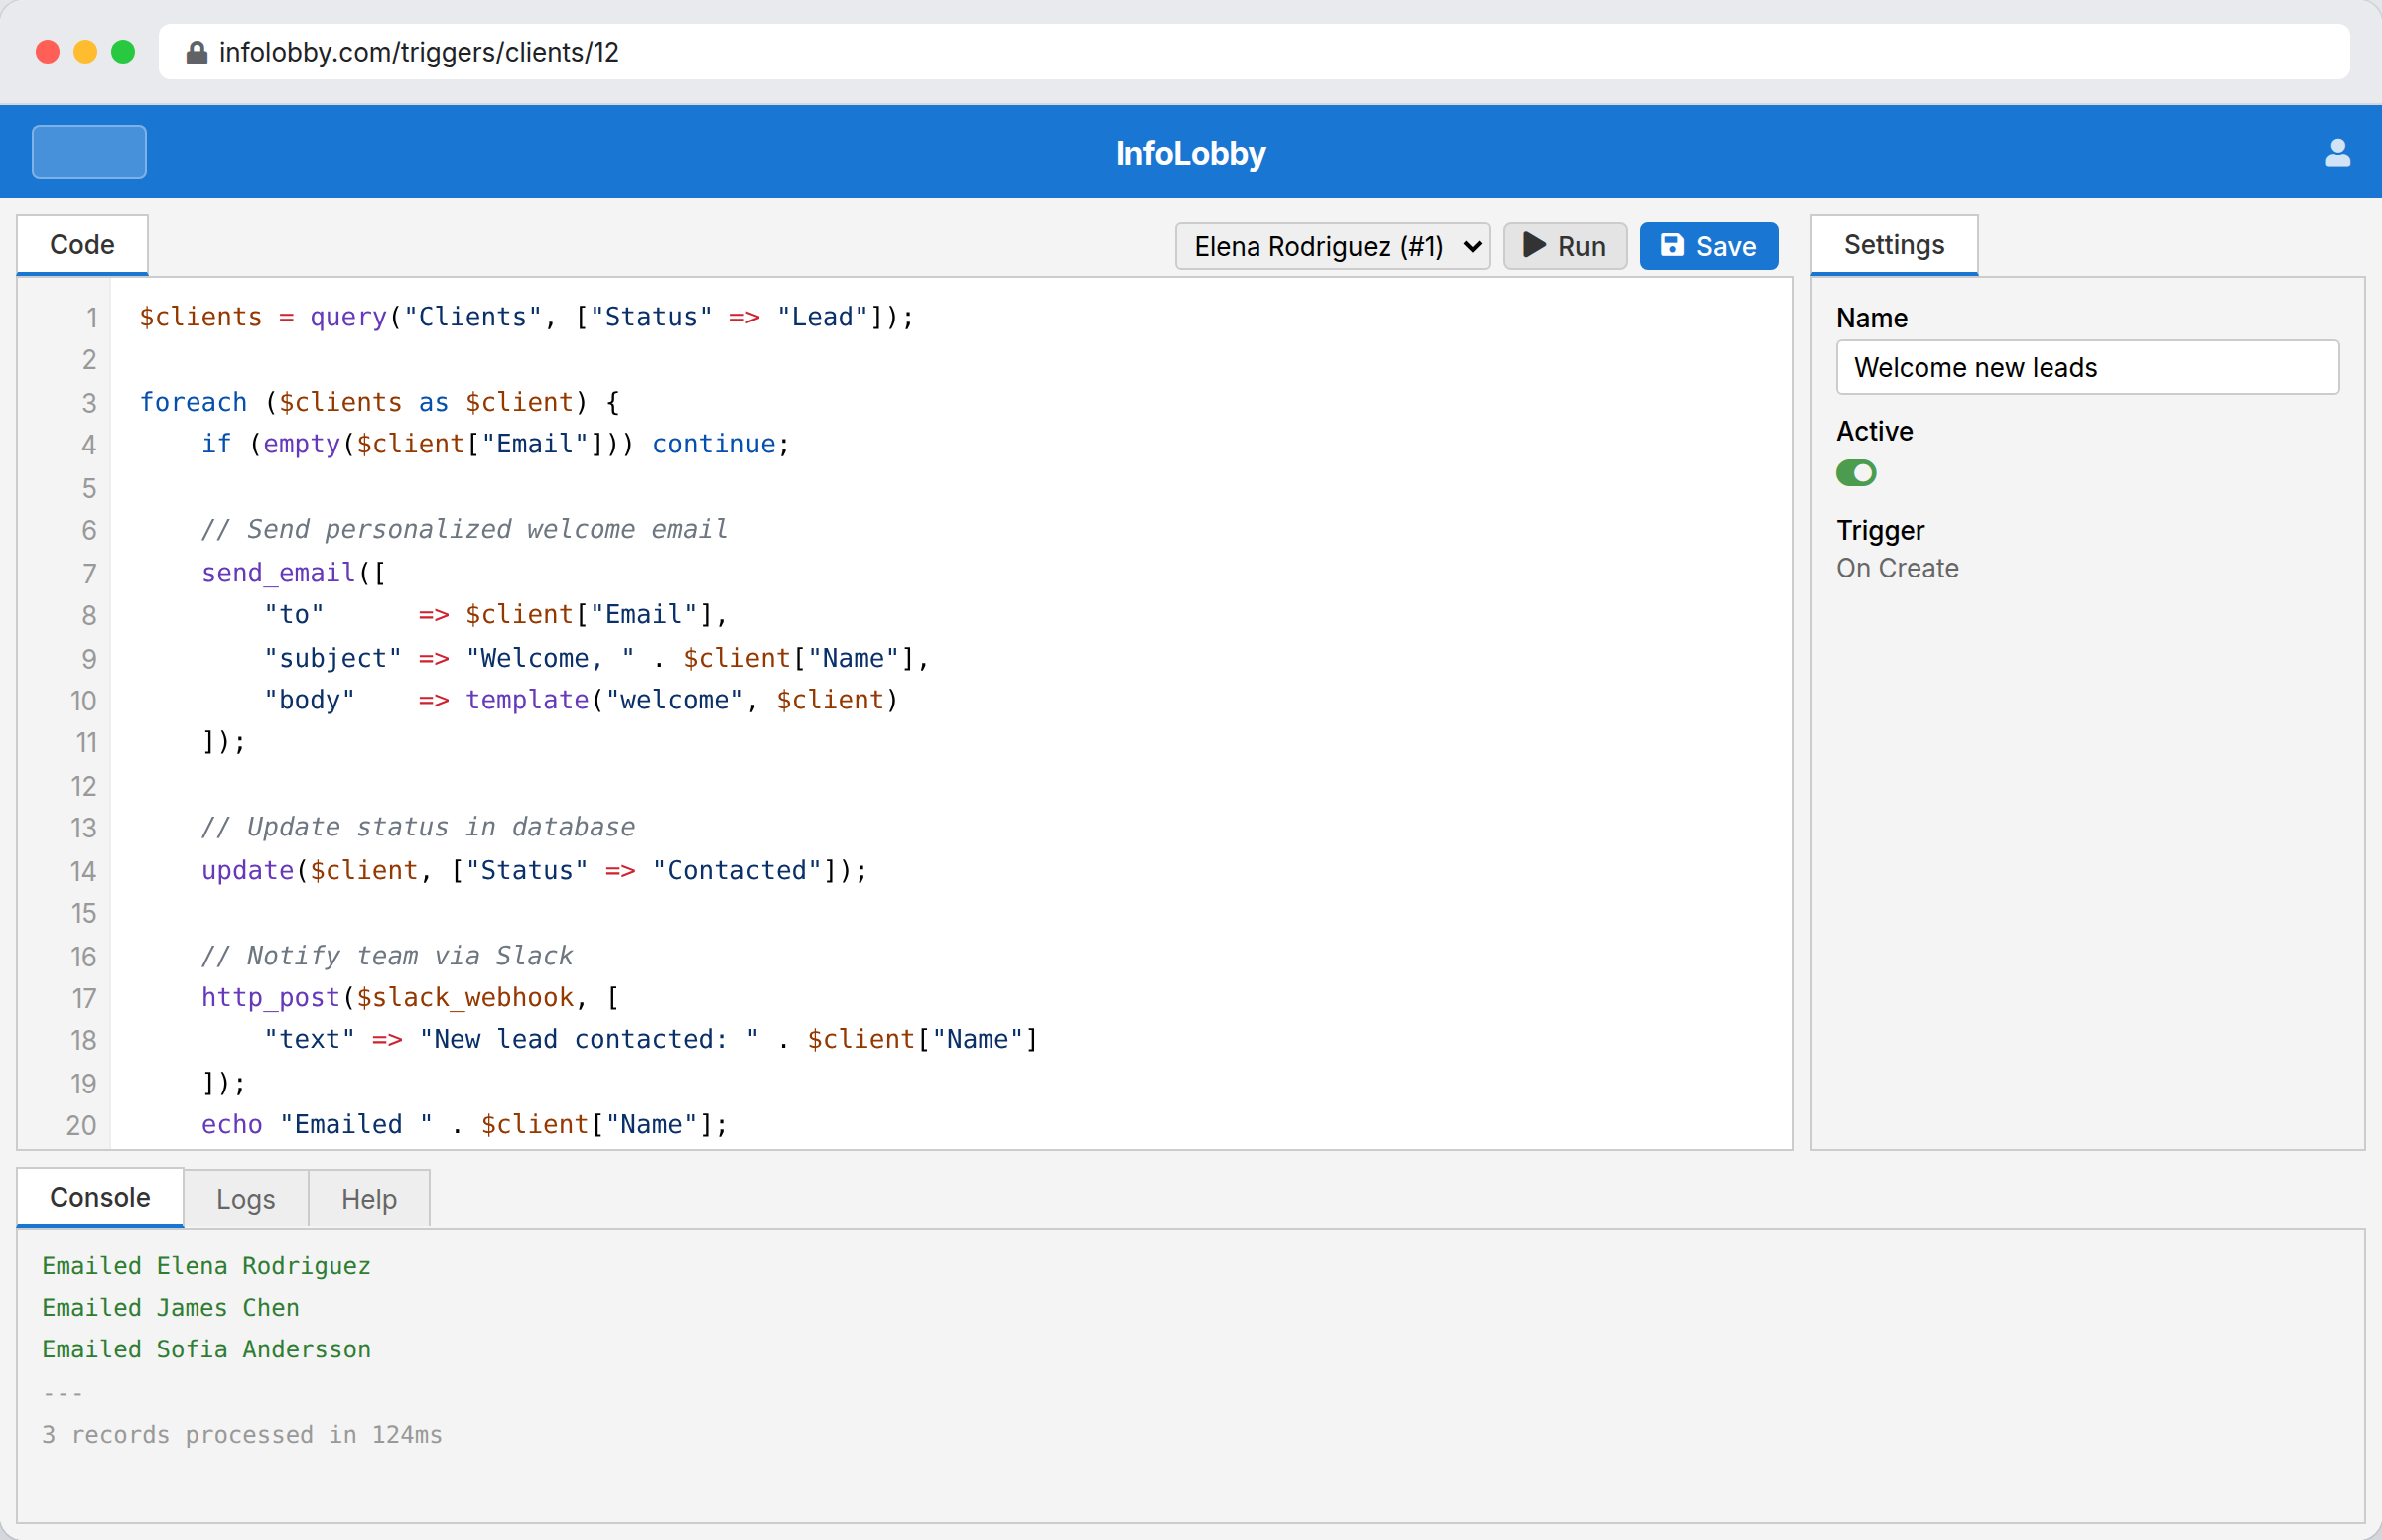
Use the visual builder for common workflows: conditions, loops, record actions, email, HTTP requests, and AI prompts.
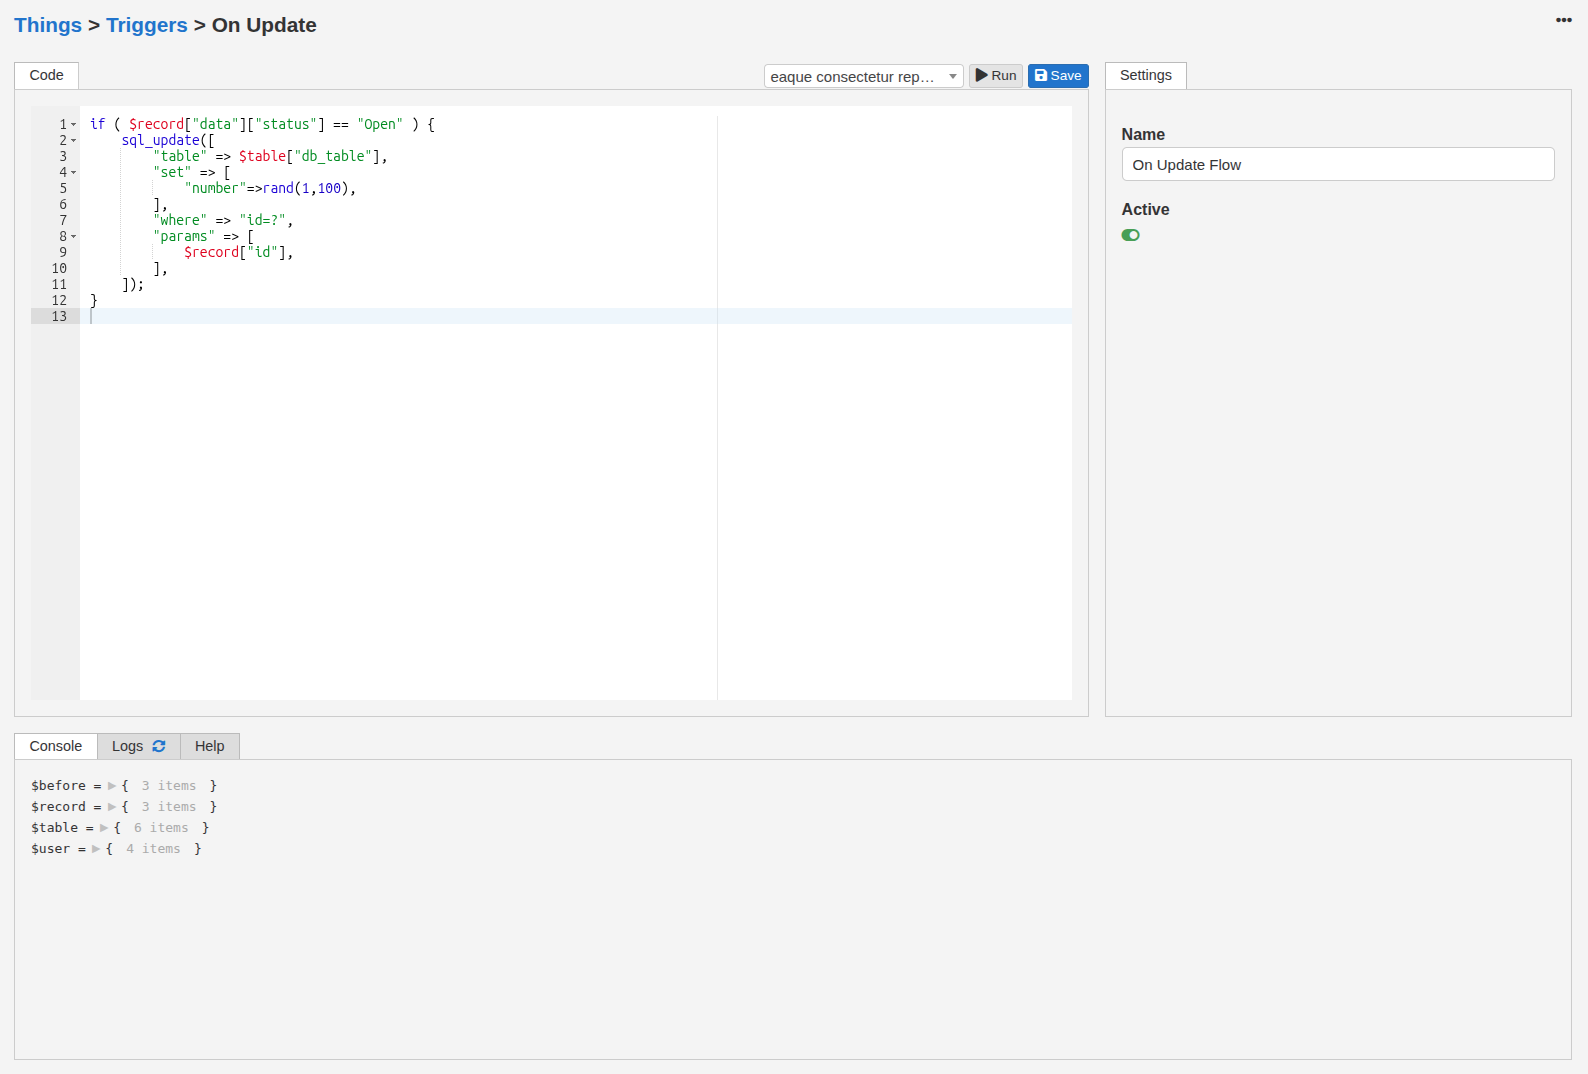
Use PHPScript — InfoLobby's code language — when you need full control. See the PHPScript reference for the language basics and every built-in function.
Visual builder steps
| Category | Step | What it does |
|---|---|---|
| Data | Query Records | Fetch records from a table into a collection variable. Tick Return single record to get one record instead of a collection — handy when you expect exactly one match (e.g. the current financial year). The step then errors if nothing matches, and you can use the record's fields directly without a loop. Query Records returns up to 100 records unless you change Limit (max 1000); if a run gets exactly that many, its log shows a warning that some may have been left out. |
| Data | Get Records From View | Fetch records through a saved view on a table. Like Query Records, a warning appears in the run log when the result fills the limit |
| Data | Get Record | Fetch a single record by ID |
| Data | Get Related | Fetch records from a related table for a selected source record. Returns up to 100 by default; raise Limit (max 1000) for more. If a run gets exactly as many records as the limit, its log shows a warning that some may have been left out |
| Data | Get Record Tasks | Fetch the open tasks attached to a selected record into a collection variable. Loop over them with For Each and read each task's {{task.title}}, {{task.status}}, {{task.due_date}}, {{task.assignee_email}}, and related values. |
| Data | Aggregate Records | Calculate a Count, Sum, Average, Minimum or Maximum over the records in a table that match your filters (the same filters as Query Records), without loading the records themselves. Sum and Average need a number, calculation or rollup field. Leave Group by empty to get one number, e.g. {{total}}. Pick a group field to get one value per group instead. Read a single group directly, e.g. {{totals.Won}}, or loop over them all with For Each and fill in Each key as: with Each item as amount and Each key as stage, {{stage}} is the group name and {{amount}} its value. A lookup group is named by the linked record's title, a user group by email. Date groups can be rolled up by day, week, month or year, and groups can be sorted by value or by name. Up to 200 groups are returned. Same as records_aggregate() in code. |
| Logic | Set Variable | Assign a value to a variable (written in a code editor with syntax highlighting, autocomplete, and token support). Tick Holds a list when the value is an array, which is what makes the variable selectable in a For Each step (see below). |
| Logic | Set HTML Variable | Assign a rich-text/HTML value (edited in a visual editor, tokens supported) to a variable |
| Logic | For Each | Loop over a collection. The Loop over dropdown lists variables that hold a list: anything from Query Records, Get Records From View, Get Related, Get Record Tasks, a grouped Aggregate Records, plus any Set Variable with Holds a list ticked. That last one is how you loop over data you built yourself or pulled from an API (see below). Each item as names the current item. The optional Each key as also names the item's key (its position in a plain list, or the group name in a grouped Aggregate Records); it must differ from Each item as. |
| Logic | If / Condition | Branch based on a condition (with optional else). On record-update flows you can also test whether a field changed or changed to a specific value. Contains and doesn't contain adapt to what you are testing. On plain text (a text field, a comment body, a webhook value, a variable) they look for the phrase anywhere inside it, ignoring capitalisation, so you can branch on a word buried in a paragraph. On multiple select, user, and lookup fields, which hold a list, they test membership: is that one of the values held? Those list fields also accept equals, which is stricter: true only when the list holds exactly that one value and nothing else. If a record can have several values selected at once, contains is almost always the one you want. An Assign Task action pointed at a multiple user field creates one task per assigned user. |
| Logic | If (Expression) | Like If / Condition, but instead of picking a value, operator, and comparison you type the whole condition as one expression with {{tokens}} — e.g. {{record.amount}} > 100 && {{record.status}} == "open". Use it when you need &&/||, arithmetic, or functions that the simple picker can't express. Has its own optional else branch. |
| Logic | Stop Flow | Halt execution with optional reason |
| Logic | Skip to Next Loop Item | Inside a For Each loop, skip the rest of the current item and move on to the next one. Only available inside a loop. |
| Logic | Comment | A note to document your flow. Does nothing when the flow runs — it just makes the flow easier to read. Shown as a highlighted note in the step list. |
| Actions | Create Record | Insert a new record |
| Actions | Update Record | Modify an existing record |
| Actions | Delete Record | Remove a record |
| Actions | Add Comment | Post a comment on a record (added as the system user) |
| Actions | Generate PDF | Render HTML content (with a file name, optional header/footer, orientation, and page size) to a PDF and append it to a record's file field. Your HTML can use the built-in fonts — including a signature script font (Alex Brush) — by setting font-family (e.g. <span style="font-family:'Alex Brush'">); the same fonts also render in rich-text fields and web pages |
| Actions | Send Email | Send via SMTP connection. Optionally pick a From sender from the connection's configured identities (defaults to the connection's first identity). Optionally link it to a record — the email is then logged on that record's comment thread and replies thread back, and you can attach the record's files matching a pattern (e.g. *.pdf). You can also add one inline attachment (a file name plus content) — text, a {{token}}, or a data: URI; pair it with make_ical() in a Set Variable step to send calendar invites (need more than one? use email_attachment() in code mode). When linked to a record you can also tick Silent to log the email without notifying the record's followers. |
| Actions | HTTP Request | GET/POST/PUT/PATCH/DELETE to a URL, with custom headers (one Name: Value per line, tokens supported) and a JSON / form-encoded / raw request body |
| Actions | API Request | Like HTTP Request, but authenticated through a saved API integration (HTTP Basic, Token/Bearer, or OAuth2). Pick the connection — auth and OAuth2 token refresh are handled for you, so no credentials live in the flow. The URL can be absolute, or relative to the connection's base URL. Saves the same response object as HTTP Request |
| Actions | AI Prompt | Send a prompt to OpenAI and save the reply. Optionally set a Timeout. AI calls wait 3 minutes by default, and a call is never allowed to outlast the automation. Waiting for a slow model doesn't count against the automation's working time, and counts at a reduced rate against your plan's runtime allowance |
| Actions | Assign Task | Create a task and assign it to someone. Pick the Assign to person from your workspace members, or use the {{user.email}} token to assign it to whoever triggered the automation. Set a title, optional details, and an optional due date or date-and-time (a due time is treated as UTC, matching record date-and-time fields — use a record date-and-time field token for it). Optionally link it to a record so the task shows up on that record. By default the task belongs to the person it is assigned to, so nobody else is dragged into its notifications just because they happened to trigger the automation. If the task should read as coming from someone in particular, set Assigned by (any workspace member, or a token such as a record's owner field). That person is only notified about comments and completions if you also tick Notify the assigner of updates. If the name you pick is no longer in the workspace, the task quietly falls back to belonging to its assignee. |
| Actions | Log Message | Write to the flow log |
| Actions | Execute Flow | Run another on-demand flow. Pick the Workspace / Table the target flow belongs to (tables you've added under Additional Workspace Access appear here too), then the Flow. Passing a Record is optional — leave it empty to run the flow with no record, or pick a single-record source (e.g. Get Record, or a Query Records with Return single record checked). Optionally bubble up errors from the called flow. |
| Actions | Web Page | (web page flows only) The HTML this page returns, edited in a visual editor with token support. Every web page flow has at least one. |
Tokens
Inside the visual builder, use {{record.fieldName}} to reference the trigger record's fields. For update triggers, {{before.fieldName}} gives the previous value. Single user fields also expose .id, .email, and .name tokens, and single lookup fields expose .id and .title. A multiple field (several users or several linked records) holds a list — when you drop its token into text (an email body, a message), the values are joined automatically (e.g. Alice, Bob); when the token is the whole value of a field assignment, the full list is passed through.
To reach records linked through a lookup, or the line items in a sub-table, see Related and sub-table records — reading across links, setting lookups, and why line rows can't be written directly.
Tip: in any token field, just type {{ and a picker pops up — keep typing to filter, use ↑/↓ to choose, Enter to insert, Esc to dismiss. (The </> button next to the field opens the same picker.)
Looping over a list
For Each loops over a variable that holds a list. Steps that fetch records (Query Records, Get Records From View, Get Related, Get Record Tasks) and a grouped Aggregate Records produce one automatically, so they show up in the Loop over dropdown straight away.
For a list you build yourself, or one that comes back inside an API response, use a Set Variable step and tell the builder it is a list:
- Add Set Variable, name it (e.g.
rows), and set the value to the list. That can be a literal like[1, 2, 3], or a token pointing into a response, e.g.{{response.json.data}}after an HTTP Request or API Request step. - Tick Holds a list on that step.
- Add For Each and pick
$rowsunder Loop over.
Without step 2 the builder treats the variable as a single value, so it never appears in the Loop over dropdown.
Items that came from an API are plain data, not records, so the field picker has nothing to offer for them. Type their tokens by hand instead: if each item looks like {"name": "...", "email": "..."}, use {{item.name}} and {{item.email}}, matching whatever the loop item is named.
Leaving the value empty with Holds a list ticked starts the variable as an empty list, which is handy when you want to collect items as the automation runs.
A grouped Aggregate Records step gives one number per group, keyed by the group name. To loop over it, set Each item as (e.g. amount) and Each key as (e.g. stage), then use {{stage}} and {{amount}} inside the loop.
Saving files from a flow
Create Record and Update Record can write to file fields by setting the field to JSON describing the file(s):
[{"url": "https://example.com/report.pdf"}]— fetches the URL and stores the file (name inferred from the URL, or set"name")[{"data": "<base64>", "name": "notes.txt", "type": "text/plain"}]— stores base64-encoded content (adata:URI works too)
Note the value replaces the field's existing files — include the current items (with their path) to keep them. Tokens inside the JSON must not contain quotes or newlines; for anything beyond simple values, build the array in code mode with record_update() instead.
Webhook and web page triggers have {{webhook.get}}, {{webhook.post}}, {{webhook.headers}}, {{webhook.body}}, and {{webhook.ip}} (the caller's IP address). Webhooks additionally have {{webhook.host}} (the caller's reverse-DNS hostname, empty when none) — this is omitted on web pages to keep page loads fast. Use dotted keys like {{webhook.get.foo}} for a query parameter, or bracket access like {{webhook.get}}["foo"].
The person who triggered the automation is available as {{user.id}} and {{user.email}} — handy for assigning a task or addressing an email to them. {{user.role}} gives their role in this workspace: admin, readwrite, or readonly, so a step can branch on what the person is allowed to do.
When nobody triggered the run (a schedule, a webhook, a public web form), the automation runs as a stand-in System user instead: {{user.id}} is 0, {{user.displayName}} is System, {{user.email}} is empty, and {{user.role}} is admin. Assigning a task to {{user.id}} won't work on those runs, since there's no real person to assign it to.
The table the automation lives on is always available as {{table.id}}, {{table.name}}, and {{table.db_table}}, on every trigger (including schedules and webhooks, which carry no record). In code mode the same variable also exposes $table["fields"], keyed by field id, where a relationship (lookup) field carries lookup_table: the linked table's id, which you can pass anywhere a table name is accepted. That lets a script follow a relationship without hardcoding the other table's name, so it keeps working in a copied workspace.
Current date and time in the workspace owner's timezone: {{now.date}}, {{now.datetime}}, {{now.time}}, {{now.timezone}}. The matching UTC tokens — {{now.date_utc}}, {{now.datetime_utc}}, {{now.time_utc}} — give the same instant in UTC; use these when writing into a record date/datetime/time field, since those fields are stored in UTC. See Dates, times, and timezones for which token to use where.
Variables from prior steps are available as {{varName}} (scalars) or {{varName.fieldName}} (objects/loop items).
Record tokens stay current. An Update Record or Generate PDF step refreshes the record it wrote, so every step after it sees the new values. Put an Update Record step first and a Generate PDF step second, and the PDF is built from the updated record. {{before.*}} is the exception: it always holds the record as it was before the automation started, which is what makes the "field changed" conditions work.
Link to another flow's URL. To reference the public address of a webhook or web page flow, use {{flow_url:<id>}} — pick the flow from the token list (under Flow URLs) rather than pasting its /webhook/… or /page/… link. This resolves to the live URL when the automation runs, so the link keeps working even after the workspace is copied or installed elsewhere (a pasted link would point at the original flow). Common uses: a record automation that emails a signing-page link, or a web page that posts back to a webhook flow.
Link to one record's edit form. To email someone a private link that lets them open and edit the record the automation is running on, use {{webform_url:<id>}} and pick the form from the token list (under Record Share Links). It needs an edit web form on that table, and it resolves to that record's own link. The link is the same one the record's Share menu shows, and stays the same on every run, so a message you sent last month still works. Reset or revoke it from the record when you need to cut someone off.
Building on the canvas
The editor opens on the Flow tab, which draws your automation as a diagram and is where you build it. Each step is a card, arrows show the order, and a condition splits into its yes and no paths. Loops are drawn as a frame around the steps that repeat, and a Stop step is shown ending the flow. Click Builder for the same automation as a plain list, and Flow to come back.
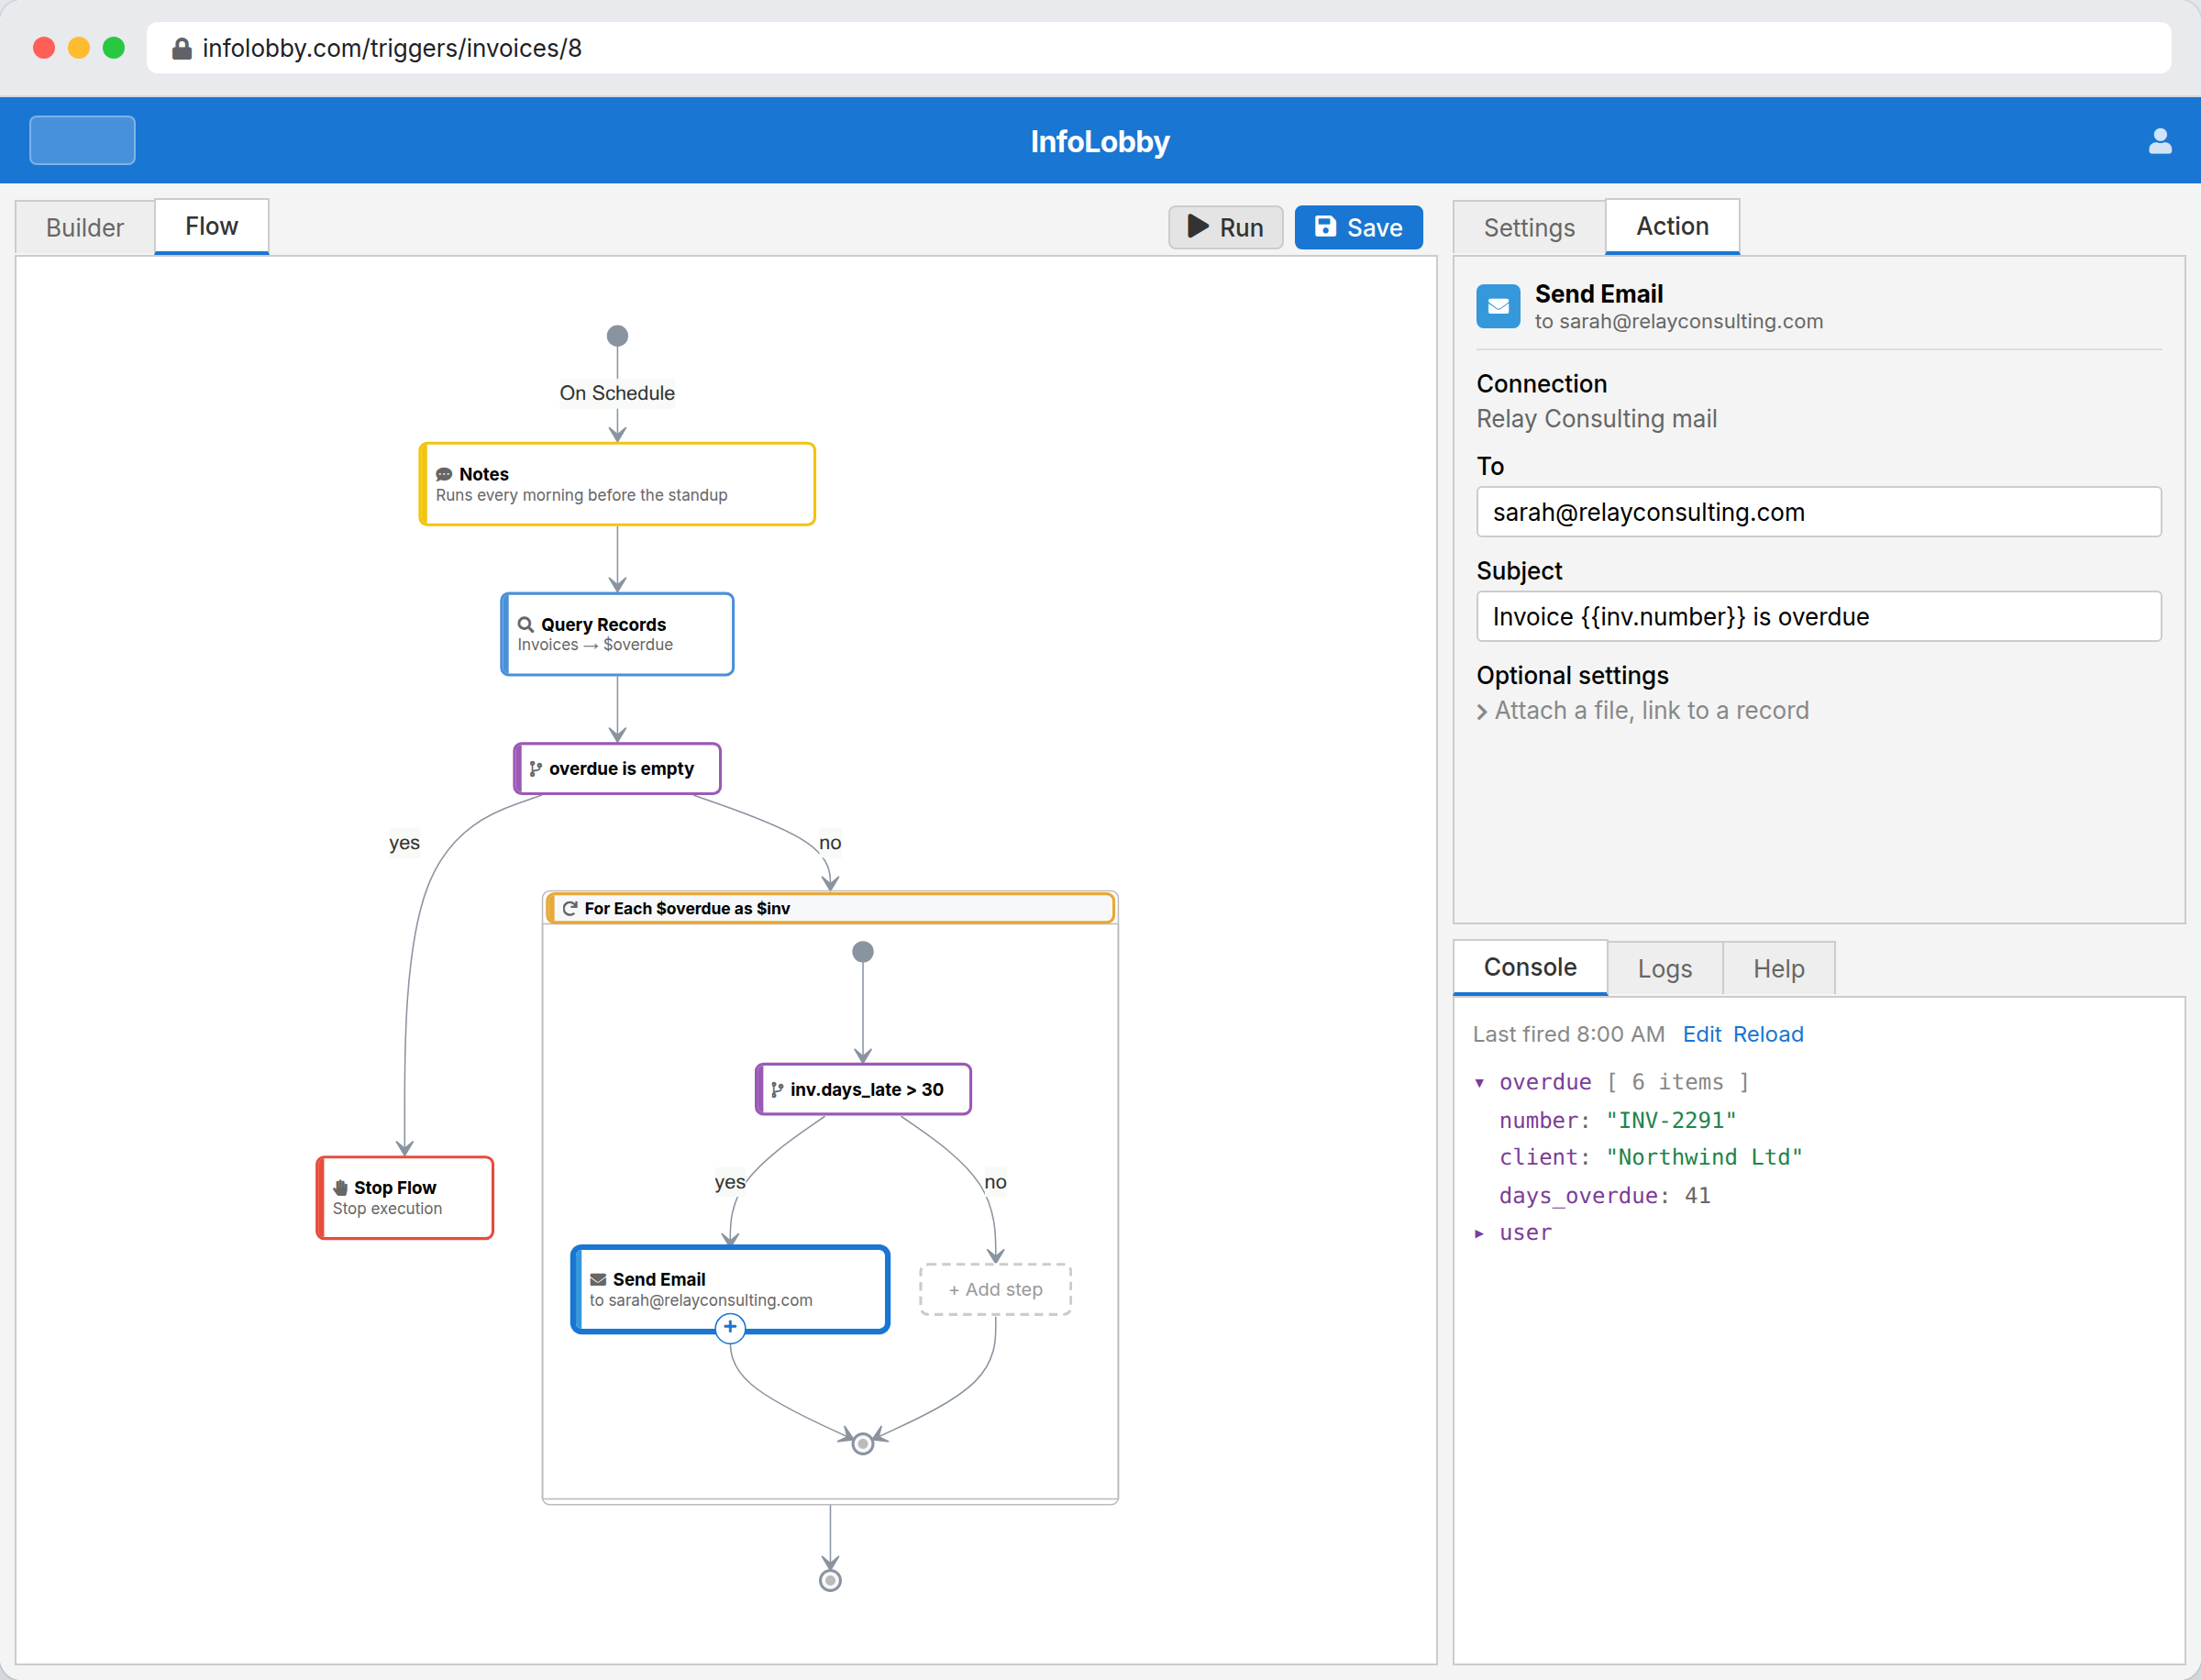
The colours match the coloured bar on each step in the Builder tab. The two are two views of one automation: edit in either, and the other keeps up.
Change a step. Click its card. Its settings open under the Action tab in the panel on the right (on a narrow screen or a phone, they open as a full-screen panel instead), with the step's name and icon at the top so you can see which one you are editing. Everything you type is kept as you go, and the card updates to match. Click an empty part of the canvas to close it again.
Add a step. Hover a card and click the + on its bottom edge, then pick a step type. The new step goes directly below the one you clicked, and its settings open right away so you can fill them in. On a condition or a loop, that + puts the new step inside it, as its first step. To add a step after a condition or a loop instead, click the round + where the condition's branches meet again, or on the bottom edge of the loop's frame. An empty branch of a condition, or an empty loop, shows a dashed + Add step placeholder: click that to put the first step inside it.
Move a step. Drag it by the grip in its top corner. A line shows where it will land: near the top of another card it goes above, near the bottom it goes below, and dropped on a condition or a loop it becomes the first step inside. Moves that would not work (dropping a loop inside itself, or dragging a Skip to Next Loop Item out of its loop) show in red and are refused.
Work with several at once. Ctrl-click (Cmd-click on a Mac) cards to select more than one, or hold Shift and drag across the canvas to draw a box around them. Then drag them together, or press Delete to remove them all at once.
Copy steps, even between automations. Select one or more steps and press Ctrl+C (Cmd+C), then Ctrl+V (Cmd+V) to paste. Pasting works in a different automation too, which is the quickest way to reuse a block you have already built. The copies are new steps, so editing one does not affect the original.
Every step in the automation appears on the canvas, including Set Variable, Log Message and Notes. Double-clicking a card takes you straight to that step in the Builder, if you prefer to work on it as a list.
If the diagram is bigger than the panel, drag the background to move around.
Testing without side effects
While building, you can test-run a flow from the editor to check its logic. A test run executes the real steps — so a flow that creates records, sends email, or calls an external service will actually do those things.
Runs you start yourself aren't held to the usual step time limit that keeps background automations in check: a flow you test from the editor, run from a button on a record, or run on selected records from the grid can take as long as it needs. You stay in control — press the Stop button (or Ctrl+C in the editor) to halt it, or close the progress window to cancel a button/bulk run.
The test payload. The Console tab shows which data the next test run will use, labelled on the line above the variables: Sample data (a placeholder, used when the flow has never fired) or Last fired with the date of the real run it came from. Two links sit next to that label. Edit opens the payload as JSON so you can change any value before running. Reload re-reads the last real fire, which is what you want while developing a webhook or web page flow: send a test request from the other service, click Reload, and the submission it just received becomes your test data without reloading the editor.
To try a flow safely, tick the small skip checkbox (next to the trash icon) on any action step that makes a change — Create / Update / Delete Record, Add Comment, Send Email, Generate PDF, HTTP Request, API Request, AI Prompt, Assign Task, or Execute Flow. During a test run a skipped step doesn't perform its action; instead it logs exactly what it would have done (its resolved values), so you can verify the rest of the flow without touching live data or sending anything. Skip has no effect on live runs — leave the boxes ticked while iterating and the flow still works normally once it's active. (Read-only and logic steps don't have the checkbox, since skipping them would just break the steps that follow.)
Error alerts
When an automation fails, admins see a warning icon () in several places:
- Workspace overview — next to the workspace name and the table name
- Table grid view — next to the table name (click to go to automations)
- Automations list — next to the flow name
- Flow editor — an error panel in the settings tab shows the last error time and details
To clear the error, open the flow editor and click Clear Error, or save the flow. Fixing and re-saving the automation automatically clears the alert.
Only active flows are counted — deactivated flows with errors do not show alerts.
Web page flows
An On Web Page flow serves a public web page. When someone visits its page URL, the flow runs right away and returns whatever HTML it produces — so you can build dynamic pages backed by your tables (status pages, dashboards, confirmation pages, simple microsites).
- The settings panel shows a Public Url (
/page/…) once you save. Anyone with the link can load the page; mark the flow Active to make it live. - Build the page with the Web Page step — a visual HTML editor with token support. Run query/logic steps before it to pull in data, then reference the results with tokens. Every web page flow keeps at least one Web Page step; you can add more and their output is joined in order.
- Incoming query string, post data, headers, body, and caller IP are available as
{{webhook.get}},{{webhook.post}},{{webhook.headers}},{{webhook.body}},{{webhook.ip}}(same as webhooks).{{webhook.host}}is webhook-only (skipped here to keep page loads fast). - If your HTML is a fragment, InfoLobby wraps it in a minimal page; if you output a full
<!doctype html>document it's returned as-is. - To protect shared infrastructure, page loads are rate-limited per account based on your plan; bursts beyond the limit briefly return a "too many requests" response.
Multi-workspace access
In the flow settings panel, you can grant a flow access to tables in other workspaces where you are an admin. This lets you query or modify data across workspaces.
Moving a table to another workspace
When you move a table to a different workspace, its own automations move with it. Before the move you'll see a summary of any automations that need updating:
- Auto-updated — visual automations that reference the table are automatically granted access to the workspace involved, so they keep working. (This widens their workspace access — anyone who can edit them can then reach data there.)
- Needs review — code automations (PHPScript) can't be updated automatically, and automations in a workspace you don't administer are left untouched. Open these and fix any table references by hand.
Tables can only be moved between workspaces in the same database and the same account. If the table has file fields, the target workspace must have file storage that matches the source's — otherwise the move is blocked so your files aren't orphaned. When a file table moves, its stored files are re-tagged to the new workspace (shown with a progress bar).
PHPScript
When the visual builder isn't enough, write your automation in PHPScript — InfoLobby's code language. It covers records, querying, comments, files, email, HTTP and API calls, AI, dates, tasks, and more.
See the dedicated reference:
- PHPScript overview — what it is and a full function index
- PHPScript basics — the language: variables, control flow, arrays, record shapes
- Function pages with parameters, samples, and example output — e.g. records_query(), record_update(), curl_request(), task_assign(), openai_gpt()
On Schedule triggers
An On Schedule automation runs on a clock rather than a record event. Configure:
- Repeat — how often it runs:
- Daily — every day (the default).
- Weekly — only on the days of the week you pick. Choose one or more (e.g. Monday and Friday) and the automation runs on each of them.
- Monthly — only on the days of the month you pick. Choose one or more numbers (e.g. the 1st and the 15th), and/or Last day of month to always run on the final day — which correctly lands on the 28th, 29th, 30th, or 31st depending on the month. A numeric day that a month doesn't have (e.g. the 31st in April) is simply skipped that month; use Last day of month if you mean the end of every month.
- Trigger Hour — the hour it runs, in your account's timezone (shown as a hint under the selector). On Daily you can also choose Every Hour to run once at the top of every hour; Every Hour isn't available for Weekly or Monthly, which need a specific hour.
If the server is briefly unavailable at the scheduled hour, the run is recovered automatically within the day rather than skipped.
On Date triggers
An On Date automation checks a date field once a day, at the hour you choose, and runs for each record whose date lands on the target day. Configure three things:
- Date field — which date (or date-and-time) field to watch. Date-and-time fields match on the day, ignoring the time.
- Day offset — a number plus before / on / after. "3 days before" fires when the date is three days away; "on" fires on the date itself; "2 days after" fires two days past it.
- Hour — the hour of day it runs, in your account's timezone.
Inside the automation, the matched record is available just like a create/update trigger — use {{record.fieldName}} tokens. Each record fires once for a given day. If the server is briefly unavailable at the scheduled hour, the run is recovered automatically within the day rather than skipped.
Silent actions (no follower notifications)
The Create Record, Update Record, Delete Record, Add Comment, Generate PDF, and Send Email (when linked to a record) actions each have an optional Silent checkbox. Check it when a flow makes routine or bulk changes that shouldn't notify the people following those records — the change is still made and still recorded in activity history, but record followers get no notification for it.
Silent only mutes notifications to followers. People you @mention in a comment, users newly assigned to a record via a user field, and task assignees are still notified.
Note that "followers" includes you, even when you are the one who ran the automation. An automation's write is the automation's change, not your own action, so it notifies you the same as anybody else following the record or table. That is what makes a button that creates a record hand you a link straight to it. Tick Silent if you would rather it stayed quiet.
In PHPScript, pass ["silent" => true] as the final argument: record_update("orders", $id, ["status" => "done"], ["silent" => true]). The same opts argument works on record_create, record_delete, record_comment, pdf_generate, and record_email_send.
How long an automation may run
There are two different limits, and they measure different things.
Working time is capped at 30 seconds by default. That's deliberate: an automation that runs unattended and gets stuck in a loop would otherwise burn your runtime allowance without anyone noticing.
Total time, waiting included, is capped at 5 minutes. Waiting on an AI model or a slow API doesn't count as working time, so an automation that calls GPT works out of the box. You don't need to change any setting for that.
If your automation genuinely does heavy work itself (looping over thousands of records, say), open it and set Maximum Run Time to the value you need. That raises how long it may spend working. Only that automation is affected. How high you can go depends on your plan (the setting shows your limit). If an automation exceeds its limit, it stops and the error appears in its run log.
Two things behave differently:
- Manual automations (run from a button, or with Run Flow on Selected) have no time limit. You're watching them, and you can stop them at any point from the progress window.
- Web page automations must answer within 55 seconds, because a browser is waiting for the page. For anything slower, have the page start the work and show the result elsewhere.
Slow API and AI calls
The HTTP Request, API Request and AI Prompt actions each have an optional Timeout: how long to wait for that one call before giving up. Leave it on Default (10 seconds for HTTP Request, 30 for API Request, 3 minutes for AI Prompt) unless you're calling something known to be slow.
A call is never allowed to outlast the automation itself. If an automation has 30 seconds left and a step asks for 5 minutes, the call is cut short to fit. Otherwise you'd wait the full 5 minutes and lose the result anyway when the automation timed out.
Runtime usage
Your plan includes a monthly automation runtime allowance.
Time your automations spend working counts in full. Time spent waiting on other services counts at a tenth. Waiting on an AI model, an API call, a web page or an email being sent is somebody else's server being slow, not your automation doing work, so a three-minute AI call costs about eighteen seconds of your allowance rather than three minutes. It isn't free, because a waiting automation still holds a slot on our servers, but it is nothing like the full price.
To see where your allowance goes:
- The account page shows your total for the period and a 30-day chart. The runtime link on that chart opens a Runtime by Flow page ranking every automation over the last 30 days, with a separate Waiting column. Click any row to open that table's automations.
- Each table's Automations list shows a Runtime (30d) column, so you can spot heavy automations in context.
If an automation looks expensive, check its Waiting column first. Usually the answer is that it's waiting rather than working, and the fix is a faster service or fewer calls, not faster code.